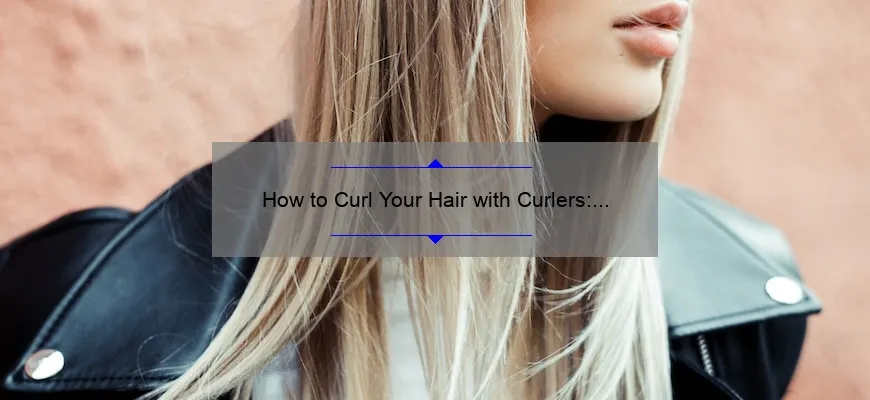
- Short answer how to curl your hair with curlers:
- Step-by-Step Guide: How to Curl Your Hair with Curlers
- Achieve Perfect Curls: Master the Art of Using Curlers
- Your Ultimate FAQ Guide on How to Curl Your Hair with Curlers
- Curly Hairstyles 101: Learn How to Curl Your Hair with Curlers like a Pro
- From Start to Finish: The Best Techniques for Curling Your Hair with Curlers
- Common Queries Answered: All About Curling Your Hair with Curlers
Short answer how to curl your hair with curlers:
To curl your hair with curlers, start with clean, dry hair. Divide it into sections and wrap each section tightly around the roller, starting from the ends and rolling towards the scalp. Secure the roller in place and repeat for all sections. Leave the rollers in for the recommended time before removing them gently to reveal your curled hair.
Step-by-Step Guide: How to Curl Your Hair with Curlers
Welcome back to our blog, where we always strive to bring you the best tips and tricks for achieving fabulous hair. Today’s topic is a step-by-step guide on how to curl your hair using curlers, because who doesn’t love those bouncy, luscious curls that can instantly elevate any hairstyle? So grab your curlers and get ready for a hair transformation!
Step 1: Prep Your Hair
Before diving into the curling process, it’s essential to prep your hair properly. Start by washing your hair with a good quality shampoo and conditioner that suit your hair type. Then, towel dry gently to remove excess water without causing damage. Apply a heat protectant spray or serum to shield your precious locks from any potential heat-related harm.
Step 2: Choose the Right Curlers
Curlers come in various shapes and sizes, each producing distinct types of curls. If you desire tighter curls, opt for smaller curlers; if loose waves are more your thing, go for larger ones. Additionally, consider the material of the curlers – foam or velcro options work excellently on damp hair, while heated rollers can speed up the process.
Step 3: Section Your Hair
Divide your hair into manageable sections to ensure you don’t miss any strands while styling. Start by sectioning off the top half of your hair with a clip or pin; this will make it easier to work on each layer individually.
Step 4: Roll Up Those Curls!
Now comes the exciting part – rolling up those strands! Take a small section of hair (about an inch wide) and wrap it around a roller starting from the ends and moving towards the roots. Secure the roller firmly in place either with clips or pins provided with the curlers. Repeat this process until all sections are rolled up neatly.
Pro tip: For extra volume at the roots, consider rolling them inwards towards your scalp. This will create a gorgeous lift that lasts all day long.
Step 5: Wait Patiently
Once you’ve successfully rolled up your hair, it’s time to exercise patience and let the magic happen. The longer you leave the curlers in your hair, the better results you’ll achieve. If you’re in a hurry, using heated rollers can speed up the process significantly – just make sure not to leave them on for an excessive amount of time to avoid damaging your hair.
Step 6: Release the Curls
After waiting for what might seem like an eternity (but is totally worth it!), it’s finally time to release those beautiful curls. Start by removing the clips or pins securing each roller, gently unraveling one roller at a time. Allow your curls to cascade down and reveal their full potential!
Step 7: Set Those Curls
To ensure your curls hold their shape for as long as possible, give them some love by setting them with hairspray or a lightweight styling product. Flip your head upside down and lightly mist your hair from underneath; this will add volume and keep those curls intact throughout the day.
Now that you have completed our step-by-step guide, embrace your stunning new look! Remember, practice makes perfect when it comes to curling with curlers. So don’t be discouraged if the first attempt doesn’t yield flawless results; keep trying until you become an expert in creating envy-worthy curls.
We hope this guide has been both helpful and entertaining in making your hair curling experience a breeze! Stay tuned for more amazing tips on hairstyling in our upcoming blog posts!
Achieve Perfect Curls: Master the Art of Using Curlers
Achieve Perfect Curls: Master the Art of Using Curlers
Do you dream of having luscious, bouncy curls that make heads turn with envy? Look no further than the humble curler! When it comes to creating beautiful curls, using curlers is an art that every woman should master. In this blog post, we will guide you through the process step by step and provide you with some professional tips and tricks to ensure your curls are nothing short of perfect. So let’s dive in!
1. Prep your hair:
Before diving into the magical world of curling, proper preparation is crucial. Start by washing your hair with a hydrating shampoo and conditioner duo to ensure your locks are nourished and ready for styling. If you have thin or flat hair, applying a volumizing mousse or spray at the roots can give your curls extra lift. For added protection against heat damage, don’t forget to apply a heat protectant spray evenly throughout your hair.
2. Choose the right type of curlers:
With numerous types of curlers available in the market, choosing the right one for your desired look is essential. Here are some popular options:
– Velcro rollers: These are great for adding volume and gentle waves.
– Hot rollers: Ideal for those who want quick and long-lasting curls without much effort.
– Flexi rods: Perfect for achieving tight curls or even looser beachy waves.
– Curling wand: If you prefer a more modern approach, this tool gives you precise control over the size and shape of your curls.
Consider factors like hair length, texture, thickness, and personal preference when selecting the perfect set of curlers.
3. Divide and conquer:
Once you’ve selected your curlers, it’s time to divide your hair into manageable sections. Start by parting your hair down the middle and securing one side with a clip or elastic band. Begin working on one section at a time, starting from the bottom and working your way up. This will help ensure that all of your curls are evenly distributed and well-defined.
4. Curling technique:
Now that you’re ready to roll (literally!), it’s time to master the curling technique. Here’s how:
– Take a small section of hair, no wider than the width of your chosen curler.
– Starting from the ends, wrap the hair around the curler, rolling it towards your scalp.
– Secure the curler in place by fastening it with clips or pins if necessary.
– Repeat this process until all sections are curled.
Remember to always curl away from your face to achieve a natural-looking finish.
5. The waiting game:
Patience is key when it comes to achieving perfect curls. Allow your hair to cool completely before removing the curlers. This helps set the curls and ensures longevity throughout the day or night. While you wait, take advantage of this downtime by using a diffuser attachment on low heat to speed up the cooling process or catch up on a good book!
6. Finishing touches for flawless curls:
To transform your stunning curls into an awe-inspiring hairstyle, follow these finishing touches:
– Gently remove each curler one by one.
– Using your fingers or a wide-toothed comb, loosely brush through your curls for added volume and tousled texture.
– A touch of hairspray will not only hold your style in place but also prevent frizz and add shine.
7. Maintaining those picture-perfect curls:
To make those gorgeous curls last longer, consider these maintenance tips:
– Avoid over-brushing or touching your hair too much throughout the day as it can disrupt their shape and cause frizz.
– Sleep on satin pillowcases instead of cotton ones to minimize friction and preserve your hard work overnight.
– Use dry shampoo at the roots between washes to combat any oiliness without weighing down your curls.
So there you have it—your ultimate guide to achieving perfect curls with curlers. With a little practice and these professional tips, you’ll be on your way to becoming a curling pro in no time. Embrace your inner hair artist, experiment with different techniques, and get ready to rock those flawless, envy-inducing curls!
Your Ultimate FAQ Guide on How to Curl Your Hair with Curlers
Welcome to our ultimate FAQ guide on how to curl your hair with curlers! Whether you’re new to the world of hairstyling or a seasoned pro looking for some fresh tips and tricks, we’ve got you covered. Curlers are an incredible tool that can help transform your look from flat and lifeless to bouncy and voluminous in a matter of minutes. So let’s dive in and get those curls poppin’!
1. What types of curlers should I use?
There are various types of curlers available in the market, each suited for different hair types and desired results. The most common ones include hot rollers, velcro rollers, foam rollers, flexi rods, and even traditional rolling pins (yes, you read that right!). Experiment with different options to find what works best for your hair texture and desired style.
2. How do I prep my hair before using curlers?
Prepping your hair is crucial for achieving long-lasting curls. Start by washing your hair with a hydrating shampoo and conditioner that suits your hair type. Next, apply a heat protectant spray or serum to shield your locks from any potential damage caused by heat styling tools. Make sure your hair is completely dry before moving on to the next step.
3. Should I use any styling products?
Yes! Using the right styling products can make all the difference when it comes to holding those curls in place. Apply a lightweight styling mousse or foam throughout your strands to provide some hold without weighing them down. If you have frizzy or unruly hair, consider adding a small amount of anti-frizz serum or oil for added smoothness.
4. How should I section my hair for curling?
Dividing your hair into sections is essential for ensuring that every strand gets equal attention and results in uniform curls. Starting at the nape of your neck, use clips or bobby pins to separate layers systematically based on the thickness of your hair. This method allows for better control and makes it easier to work through each section.
5. What’s the best way to wrap my hair around the curlers?
When wrapping your hair around the curler, ensure that you start from the ends and work your way up towards the roots. To achieve tighter curls, roll smaller sections of hair tightly around each curler. For loose waves or bigger curls, use larger sections and wrap them more loosely. The key is to find a balance between tension and comfort.
6. How long should I leave the curlers in my hair?
The duration hair should stay in curlers largely depends on your desired tightness or looseness of curls, as well as the type of curlers you’re using. Most hot rollers require at least 10-15 minutes to set properly, whereas velcro or foam rollers can be left in for a few hours for maximum impact. Make sure not to rush this step, as it directly affects the longevity of your curls.
7. How can I make my curls last longer?
To make your beautiful curls last all day (or even overnight), there are a few tricks you can try. Firstly, allow the curled hair to cool down completely before removing the curlers – this helps set them in place better. Spritz some lightweight hairspray onto each section after taking out the curler to provide additional hold without leaving a heavy residue. Also, avoid running your fingers through your curls too much as it can disrupt their shape and cause frizz.
8. How do I maintain my curled hairstyle?
To keep those stunning curls intact for as long as possible, consider using a satin or silk pillowcase while sleeping – these materials reduce friction against your hair and prevent unnecessary tangles and frizz. Additionally, avoid excessive heat styling between washes and opt for dry shampoo when needed instead of frequently washing your hair, which can weigh it down and loosen the curls.
9. How can I add extra volume to my curled hair?
If you’re looking for some extra oomph in your curls, try teasing the roots of each section gently using a fine-toothed comb or teasing brush before rolling them onto the curlers. Additionally, applying a volumizing mousse or using a root-lifting spray directly at the roots will help create long-lasting lift and body.
10. Can I curl synthetic hair extensions with curlers?
Most synthetic hair extensions cannot withstand heat, so using hot rollers or any other heated curler is not recommended. However, there are specially designed curlers or foam rollers available that can be used on synthetic fibers – just make sure to follow the manufacturer’s instructions for best results.
Now that you have our ultimate FAQ guide on how to curl your hair with different types of curlers, it’s time to unleash your inner hairstylist! These tips and tricks will surely help you achieve gorgeous curls that turn heads wherever you go. Remember to experiment, have fun, and embrace the unique beauty of your curls!
Curly Hairstyles 101: Learn How to Curl Your Hair with Curlers like a Pro
Curly Hairstyles 101: Mastering the Art of Curling Your Hair with Curlers like a True Pro
Are you tired of your dull and lifeless straight hair and longing for gorgeous luscious curls? Well, you’re in luck! We’ve got you covered with our comprehensive guide on how to curl your hair like a pro using good ol’ curlers. Get ready to unleash your inner bombshell and embrace those fabulous ringlets!
Why Go for Curlers?
Before we dive headfirst into the technique, let’s take a moment to appreciate why curlers are an excellent choice for achieving that sought-after curly hairstyle. Unlike heat styling tools like curling irons or wands, which can potentially damage your hair in the long run, curlers offer a more gentle and safer alternative. Plus, they come in various shapes, sizes, and materials, giving you complete control over the type of curls you desire.
Choosing the Perfect Curler:
Finding the right type of roller is essential for obtaining optimal results. If you have shorter hair or prefer tighter curls, smaller rollers are your go-to option. On the other hand, larger rollers work wonders for creating loose waves or voluminous curls for longer locks.
Brush Up on Preparations:
As with any hairstyle journey, adequate preparation is key. Begin by washing your hair thoroughly and conditioning it with a nourishing product that suits your specific hair type. Towel-dry gently; avoid rough handling to prevent unnecessary frizziness.
To ensure perfect roll placement without any kinks or weird lines formed by bobby pins under traditional curlers, we recommend using Velcro or self-gripping rollers instead. These innovative tools provide ultimate hold without extra accessories – easy peasy!
Sectional Divisions Make All the Difference:
Now comes the part where strategizing pays off. Divide your hair into multiple sections based on its thickness – this will enable an organized and efficient curling process. Starting at the nape of your neck, separate a small section of hair and comb it through to remove any knots or tangles.
Roller Placement: The Artistry Begins!
Here comes the fun part – actually curling your hair! Grab a roller of suitable size for your desired effect and start by gently wrapping the ends of the sectioned hair around it. Roll upwards towards the roots while keeping tension on the hair to ensure a smooth finish.
To secure everything in place, make sure that the roller is parallel to your scalp. If you prefer extra longevity in your curls, apply some heat from a blow dryer for a few seconds before moving on to the next roller.
Patience is Key:
Once all sections are securely rolled up and pinned down, take a moment to appreciate your temporary hairstyle transformation. Now, it’s time for some waiting game – give yourself at least 30-40 minutes for those tantalizing curls to set. Utilize this time wisely by enjoying some light reading or practicing your favorite TikTok dance routine.
Unleash Your Inner Diva:
After what feels like an eternity, it’s finally time to unleash those cascading curls! Carefully unravel each roller, starting from where you began placing them onto your head. Here’s where you’ll discover if patience pays off; gorgeous bouncy curls are now within reach!
Enhancement Techniques:
To add some extra oomph and ensure long-lasting hold, gently tousle your freshly curled locks with your fingers or use a wide-toothed comb for soft definition. If you’re aiming for an even more polished look, feel free to spritz on some hairspray – just don’t go overboard; we don’t want crispy curls!
Maintenance Tips:
Now that you’ve achieved enviable curly perfection, let’s talk about preserving it. A silk scarf or pillowcase can work wonders in preventing frizz caused by rough surfaces during sleep. Additionally, avoid excessive heat styling or harsh hair products to maintain the health and vibrancy of your curls for as long as possible.
There you have it – our ultimate guide to curling your hair with curlers like a pro! Whether you’re preparing for a special event or simply want to embrace a new look, these tips and tricks will ensure you rock those stunning curls with confidence and flair. Say goodbye to lifeless locks and hello to fabulousness!
From Start to Finish: The Best Techniques for Curling Your Hair with Curlers
Are you tired of spending hours trying to achieve those perfect curls, only to end up with strands that fall flat within minutes? Well, worry no more! In this blog post, we will take you through the entire process of curling your hair using curlers, from start to finish. Get ready to transform your locks into bouncy waves that will turn heads wherever you go!
Step 1: Preparation is Key
Before diving into the curling process, it’s important to properly prepare your hair. Start by washing it thoroughly with a nourishing shampoo and conditioner. Towel-dry gently and apply a heat protectant spray to prevent damage caused by the hot curlers. Trust us, these little steps will make a huge difference in achieving long-lasting curls!
Step 2: Choosing the Perfect Curler
Now that your hair is prepped and ready to go, let’s dive into the exciting world of curlers! There are various types available on the market — ceramic, foam, magnetic, and even heated rollers. Each type offers unique benefits for different hair types and desired results. For thinner or shorter hair, foam or magnetic rollers work wonders. If you crave voluminous curls with major staying power, opt for ceramic or heated rollers.
Step 3: Section It Off
Divide your hair into manageable sections using clips or elastics. Starting from the bottom layer and working your way up will ensure that each section gets equal attention and fabulous curls. Trust us; this step might seem tedious at first but it’s well worth it when you see those perfectly defined curls cascading down!
Step 4: Roll Like a Pro
Time to get rolling – literally! Take one section of hair at a time and wrap it around the roller in an upward direction towards your scalp. Ensure that each curler is evenly placed throughout your head while leaving some space between each roller for better heat distribution. Don’t forget to tuck in the ends securely to avoid unraveled curls!
Step 5: Lock it in Place
After all your hair is securely wrapped around the curlers, take a moment to ensure they are firmly locked in place. Paying attention to this step will prevent any accidental detangling and ultimately maintain the shape of your curls. Think of it as securing a precious treasure – these curls are your crowning glory!
Step 6: Time to Wait
Now comes the hardest part for those impatient curling enthusiasts – waiting! The time required for your hair to set will vary depending on the type of curlers you’ve chosen, but don’t fret, patience is key! Use this time wisely; catch up on your favorite Netflix show, finish that pending crossword puzzle, or simply indulge in some self-care. Trust us; it will be worth it when you unravel those stunning curls!
Step 7: Unleash Your Inner Diva
Once the waiting game is over and you’ve perfected your impression of Mona Lisa with all those mysterious smiles (because who can resist admiring their covered-up beauty secrets?), it’s finally time to unwrap those curlers and witness the magic! Carefully unravel each roller from your hair, gently shaking out the curls with your fingers. The result? Gorgeous bouncy waves that would make even Rapunzel envious!
Step 8: Seal the Deal
To ensure that your hard work doesn’t go down the drain after a few hours, seal those fabulous curls with some hairspray! Choose a lightweight formula that won’t leave your hair feeling stiff or sticky while still providing enough hold. Lightly mist over your head from a comfortable distance and voila! Your picture-perfect curled hairstyle is complete.
Congratulations on conquering the art of curling with curlers! By following these steps from start to finish, you’ll achieve salon-worthy results right in the comfort of your own home. So, embrace your newfound knowledge, and get ready to rock those stunning curls with confidence!
Common Queries Answered: All About Curling Your Hair with Curlers
Welcome to our blog, where we aim to answer all your common queries about curling your hair with curlers. Whether you’re a beginner or a pro looking for some new tips and tricks, we’ve got you covered. Let’s dive in and explore this fascinating topic!
1. What are Curlers and How do they Work?
Curlers are fantastic hairstyling tools that help create beautiful curls or waves in your hair. They come in various shapes and sizes, including hot rollers and Velcro rollers. The concept is simple – you wrap sections of your hair around the curlers, secure them in place, and wait for the magic to happen.
Hot rollers use heat to set the curl, while Velcro rollers grip the hair without any additional heat. Both types work by reshaping the hydrogen bonds within your hair strands temporarily, creating stunning curls or waves that can last for hours.
2. Which Curler Size Should I Use?
Choosing the right size of curlers is crucial for achieving your desired look. Larger curlers give you loose, beachy waves, while smaller ones create tight curls with lots of bounce.
For shorter hair or tighter curls/waves, opt for smaller-sized curlers (around ¾ inch). Medium-sized curlers (around 1 inch) are perfect if you want a versatile look that allows for both loose waves and defined curls. If you have longer hair or prefer soft waves, go for larger-sized curlers (around 1 ½ inches).
Remember, experimentation is key! You might discover unexpected looks by mixing different sizes or combining large and small rollers together.
3. How Do I Get Long-Lasting Curls?
While using good quality heat protection products is essential before applying any heat styling tool to your hair, there are some additional ways to make those curls last longer:
a) Sectioning: Divide your hair into manageable sections before starting to roll them up on the curlers. This ensures even heat distribution and helps maintain consistent curls throughout your hair.
b) Tension: When wrapping your hair around the curlers, create a slight tension by pulling the hair gently. This helps in creating more defined and longer-lasting curls.
c) Cool Down Time: Allow the curls to cool down completely before removing the curlers. This step is crucial as it allows the hydrogen bonds to reform, setting your curls in place for an extended period.
4. Can I Achieve Different Curling Techniques with Curlers?
Absolutely! Curlers offer endless possibilities for you to experiment with different curling techniques:
a) Classic Curls: Wrap your hair around the curler from ends to roots, ensuring each section is wrapped in a neat and uniform manner. The classic technique creates timeless curls that suit any occasion.
b) Beachy Waves: For those effortless, casual waves, wind your hair around the curler haphazardly without worrying too much about perfect sections or uniformity. Leave some ends uncurled for a natural look.
c) Soft Loose Curls: Twisting your hair first before wrapping it around the curler results in soft, loose curls that are perfect for achieving an elegant yet relaxed style.
5. How Can I Maintain Healthy Hair While Curling?
Heat styling can be harsh on our locks if not done correctly or appropriately protected:
a) Heat Protection: Always apply a heat protectant spray or serum to shield your strands from high temperatures.
b) Don’t Overdo It: Avoid excessive heat exposure by regulating temperature settings on hot rollers or using moderate heat with other types of curlers. High heat can cause damage and lead to split ends or breakage over time.
c) Moisturize Regularly: Keep your hair hydrated by using deep conditioning treatments regularly and replenishing moisture lost due to styling.
d) Limit Frequency: Give your hair regular breaks from heat styling to prevent long-term damage. Embrace your natural hair texture or try alternative heatless styling techniques, such as braiding or rag curls.
We hope this comprehensive guide has answered all your queries about curling your hair with curlers. Remember, practice makes perfect, so take some time to experiment and find the techniques that suit you best. Enjoy creating stunning curls and waves that make heads turn!


