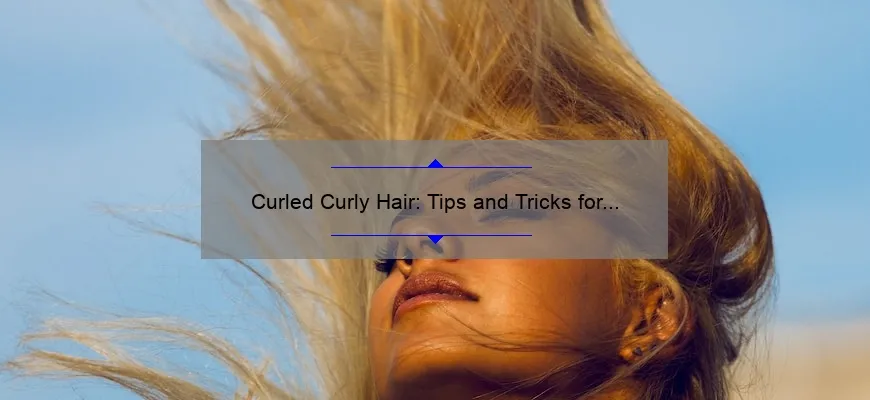
- Short answer: Curled curly hair
- How to Achieve Curled Curly Hair: A Step-by-Step Guide
- The Ultimate FAQs about Curled Curly Hair Answered
- Tips and Tricks for Perfectly Curled Curly Hair
- Mastering the Art of Curling Curly Hair: Do’s and Don’ts
- The Best Products and Tools for Long-lasting Curled Curly Hair
- Embracing Your Natural Curls: Enhancing and Defining with Curling Techniques
Short answer: Curled curly hair
Curled curly hair refers to a hairstyle where naturally curly hair is further enhanced by adding curls using heat styling tools or other techniques. This results in more defined and voluminous curls that can vary in size and shape. Curled curly hair is favored by individuals looking to achieve a more polished and stylized look for special occasions or everyday wear.
How to Achieve Curled Curly Hair: A Step-by-Step Guide
Title: How to Achieve Curled Curly Hair: A Step-by-Step Guide
Introduction:
Curled curly hair adds an enchanting touch to your overall appearance, exuding confidence and personality. While many people assume achieving those dreamy curls is a time-consuming task, we’re here to prove them wrong! In this step-by-step guide, we’ll walk you through the process of achieving luscious curled curly hair that will make heads turn. So get ready to unlock the secrets that will revolutionize your hairstyling game!
Step 1: Prep Your Hair
Before diving headfirst into curling, it’s essential to prepare your hair for this transformation. Start by thoroughly washing your hair using a moisturizing shampoo and conditioner specifically designed for curly hair types. This step ensures clean and healthy strands as the foundation for stunning curls.
Step 2: Magic Potion – Apply Some Curl Enhancers
To maximize the potential of your natural curls, reach for curl-enhancing products such as mousse or curl cream. Apply these magic potions evenly throughout damp hair, focusing on the mid-lengths and ends.
Pro-tip: Scrunching sections of your hair gently while applying product enhances definition and encourages those gorgeous tendrils.
Step 3: Unleash the Heat – Utilize a Diffuser
Now it’s time to bring out the big guns – your trusty diffuser! Attach it to your blow dryer while setting it on low heat with medium airflow. Flip your head upside down and cup sections of your curls within the diffuser, allowing warm air to kiss each strand naturally.
Pro-tip: To avoid frizz, don’t over-dry! Keeping some moisture in your curls helps maintain their shape and bounce.
Step 4: Precision Matters – Time to Section
Pfft… Who needs chaos when we have well-organized sections? Divide your hair into manageable portions using clips or bobby pins. This process ensures that every curl gets the attention it deserves, resulting in consistent and envy-inducing spirals.
Step 5: Curling Wands – The Magic Wands of Hair
Here comes the star of the show – your trusty curling wand! Remember to choose a barrel size depending on your desired curl type. Wrap individual sections of hair around the wand, starting from mid-lengths and working your way down towards the ends.
Pro-tip: To achieve a more natural-looking outcome, alternate between wrapping sections towards and away from your face – hello, dimension!
Step 6: Hold it Still – Let Curls Cool Down
Oh, patience…the secret ingredient for perfect curls! Allow each freshly curled section to cool completely before releasing them. This cooling period sets your curls’ structure and enhances their longevity by preventing premature drooping.
Step 7: Shake Things Up (Gently) – Say Hello to Styled Curls
Once all sections have cooled down, it’s time to unleash those stunning curly locks! Use your fingers or a wide-toothed comb to gently separate and fluff up the curls for that natural-looking bounce.
Pro-tip: Want long-lasting results? Apply a light-hold hairspray or anti-frizz spray to lock in the shape without weighing down your gorgeous coils.
Conclusion:
Congratulations on mastering the art of achieving beautifully curled curly hair! By following this step-by-step guide and incorporating our pro tips into your routine, you’re now armed with the knowledge needed to rock those mesmerizing curls every day. Bask in the compliments and embrace your newfound confidence as you conquer any room with enviable tresses that demand attention. Remember, with a little practice and some essential styling know-how, you can unleash truly magical results!
The Ultimate FAQs about Curled Curly Hair Answered
Welcome to the ultimate guide for all your burning questions about curled curly hair! We know that managing those luscious locks can sometimes be a challenge, but fear not, because we have got you covered. From styling tips to maintenance tricks, we are here to provide detailed and professional advice that will leave you with envy-inducing curls.
First things first, let’s talk about what exactly is curved curly hair. This type of hair is characterized by its unique S or Z-shaped curl pattern, which adds volume and dimension to your overall look. Whether you were born with naturally curly hair or have perfected those curls with some help from styling tools, this guide will address all your concerns.
1. What products should I use for my curled curly hair?
Finding the right products for your curls is essential in maintaining their health and enhancing their natural beauty. Start by using a gentle shampoo and conditioner specifically designed for curly hair. Look out for ingredients like shea butter or argan oil as they provide moisture and reduce frizz.
To style your curls, opt for lightweight creams or gels that won’t weigh them down. Apply these products when your hair is still damp to lock in moisture and define each curl without creating stiffness.
2. How often should I wash my curled curly hair?
Unlike straight hair, curled curly hair doesn’t need frequent washing as it tends to be drier and more prone to frizz. It is generally recommended to wash your curls every two to three days. However, feel free to adjust this frequency according to how oily or dry your scalp feels.
Remember, over-washing can strip away the natural oils that keep your curls healthy and moisturized.
3. How can I prevent frizz in my curled curly hair?
Frizz is often the arch-nemesis of fabulous-looking curls, but fear not! Preventing frizz starts right in the shower with a good conditioner that hydrates your locks adequately. After washing, gently pat your hair dry with a microfiber towel or an old t-shirt to minimize friction and reduce frizz.
Avoid brushing your hair vigorously as this can disrupt the curl pattern and cause more frizz. Instead, try finger-combing or using a wide-toothed comb when necessary.
4. How should I style my curled curly hair for different occasions?
The versatility of curled curly hair allows you to experiment with various styles for different occasions effortlessly. For a casual day out, embrace your natural curls by applying a leave-in conditioner and letting them air dry naturally. This will give you that effortlessly chic look everyone craves.
If you want to amp up the glam factor, create defined ringlets using hot rollers or curling irons. Finish off with a lightweight hairspray to hold the curls in place without sacrificing their bounce and movement.
5. How can I protect my curled curly hair while sleeping?
Sleeping can be tough on those perfect curls created during the day, but there are ways to protect them as you catch some Z’s (pun intended!). Invest in a satin or silk pillowcase that reduces friction and minimizes frizz while you sleep.
Alternatively, gather your hair into a loose bun on top of your head or braid it before bed to prevent tangles and keep those curls intact until morning.
So there you have it – all your burning questions about curled curly hair answered! Armed with these professional tips, witty tricks, and clever solutions, go forth confidently with your fabulous mane of luscious curls. Embrace the unique beauty of curled curly hair and let it be an expression of your vibrant personality!
Tips and Tricks for Perfectly Curled Curly Hair
Are you tired of dull, lifeless curls that never seem to hold their shape? Look no further! We’ve got the ultimate guide to help you achieve perfectly curled curly hair. With these tips and tricks, your locks will be bouncing with fabulous curls all day long.
1. Prep is Key: Before diving into the curling process, it’s essential to prepare your hair properly. Start by washing and conditioning with products specifically designed for curly hair. This helps maintain moisture and prevent frizz. Follow up with a leave-in conditioner or curl-enhancing cream to provide additional hydration and definition.
2. Section Your Hair: To ensure even curls throughout your entire head, divide your hair into manageable sections. This allows you to focus on one area at a time and ensures that every curl receives equal attention. Use clips or hair ties to secure the sections while working on others.
3. Heat Protectant is a Must: Exposing your hair to heat without protection can lead to damage and breakage in the long run. Always use a heat protectant spray or serum before using any hot styling tools such as curling irons or wands. This protective layer will guard your strands from excessive heat while helping the curls set better.
4. Choose the Right Curling Tool: When it comes to curly hair, not all curling tools are created equal! Opt for a wand or curling iron with a wider barrel size (around 1-2 inches) rather than smaller ones typically used for straighter styles. The larger diameter helps create more natural-looking, voluminous curls that won’t appear too tight or stiff.
5. Master Your Technique: Achieving beautiful curls requires finesse in your technique. Start by wrapping small sections of hair around the barrel away from your face, holding each one for about 10 seconds before releasing. Remember not to twist the iron as it can result in awkward kinks instead of smooth waves. Work your way around each section, alternating the direction of the curls for a more effortless, lived-in look.
6. Cool Down and Set: Once you have curled each section, don’t rush to touch or comb through the curls immediately. Allow them to cool down completely before manipulating them further. This ensures that the curls will set and stay in place much longer. You can speed up the cooling process by gently fanning the hair or using a cool shot on your blow dryer.
7. Enhance and Define: Now it’s time to give those curls some extra oomph! Use a wide-toothed comb or your fingers to gently separate and loosen the curls for added volume and definition. To tame any frizz or flyaways, lightly mist a flexible hold hairspray over your head while scrunching with your hands.
8. Preserve Your Curls: Don’t let all your hard work go to waste overnight! To preserve those stunning curls while you sleep, loosely tie your hair into a pineapple or wrap it in a silk scarf before bed. This technique prevents friction and helps maintain curl shape for multiple days without re-styling.
With these tips and tricks for perfectly curled curly hair in your arsenal, say goodbye to lackluster tresses! Embrace vibrant, bouncy curls that turn heads wherever you go. Remember, practice makes perfect – so grab your curling tools and get ready to rock fabulous curls like a pro!
Mastering the Art of Curling Curly Hair: Do’s and Don’ts
Mastering the Art of Curling Curly Hair: Do’s and Don’ts
Curling your hair can be a daunting task, especially if you have naturally curly hair. But fear not! With the right techniques and tools, you can achieve stunning curls that will turn heads wherever you go. In this blog post, we will delve into the do’s and don’ts of curling curly hair to help you master this art and embrace your gorgeous locks.
Do: Prep your hair
Before diving into curling, it’s essential to ensure that your hair is adequately prepped. Start by washing and conditioning your tresses with products specifically designed for curly hair. These products will moisturize your locks and enhance their natural texture, making them more responsive to styling.
After washing, gently towel-dry your hair to remove excess moisture. Avoid rubbing vigorously as it can cause frizz. Instead, dab or scrunch with a microfiber towel or an old cotton T-shirt to softly absorb water without disturbing the curl pattern.
Don’t: Forget heat protection
Curly hair tends to be more prone to damage than straight hair, so applying a heat protectant is crucial before using any hot tools. Look for a lightweight spray or serum that provides thermal protection while ensuring hydration for the delicate structure of curly strands.
Do: Section properly
Dividing your curls into sections is vital when curling them. This approach allows you to work through small portions at a time, resulting in neatly defined curls throughout your entire head.
Start by splitting your mane into top and bottom sections with clips or pins. Next, further divide each section according to the size of curls you desire – smaller sections create tighter curls while larger ones give loose waves. When working on each portion individually, pin away uncurled sections so they won’t interfere during styling.
Don’t: Overdo it on the heat
While achieving bouncy curls may seem tempting, exposing your curls to excessive heat can cause irreversible damage. Opt for a moderate temperature setting on your curling iron or wand, as high heat can lead to dryness and breakage.
Also, avoid keeping the heat applied for too long. As a general rule of thumb, hold each section around the barrel for 7-10 seconds. Keep in mind that less time equals looser curls, whereas more time results in tighter coils.
Do: Maintain moisture
Curly hair craves moisture to retain its shape and prevent frizz. Consider using a lightweight curl-enhancing cream or serum before styling to both hydrate and define your curls effectively. Work the product through each section with your fingers or use a wide-toothed comb while avoiding excessive manipulation that could lead to frizz.
Additionally, keep a water spray bottle handy as you style your hair to refresh any sections that may have dried out during the process.
Don’t: Skip the cool-down period
Once you’ve curled all sections of your hair, resist the temptation to immediately run your fingers through those luscious curls. Allow them to cool down completely first. This step is crucial as it sets the curls and gives them longevity throughout the day.
Instead of touching them right away, use this time to apply finishing products like hairspray or shine serum for extra hold and added gloss. Afterward, gently separate or fluff up the cooled curls with your fingers to achieve effortless volume.
In conclusion, mastering the art of curling curly hair requires some patience and practice but armed with these do’s and don’ts, you’ll be well on your way to becoming a pro curler! Remember to prep properly, protect against heat damage, section meticulously, maintain moisture at every step of styling, give ample time for cooling down… And voila! Prepare yourself for breathtaking results that will leave everyone envious of your stunning curly mane!
The Best Products and Tools for Long-lasting Curled Curly Hair
Are you tired of spending hours perfecting your curly hair only for it to fall flat within minutes? We feel your pain. Long-lasting curled curly hair requires the right combination of products and tools to keep those curls bouncy and defined all day long. Luckily, we’ve rounded up the best products and tools on the market that will help you achieve the beautiful, long-lasting curls you’ve always dreamed of.
When it comes to products, a top-notch curl-enhancing shampoo and conditioner are essential. Look for formulas with nourishing ingredients like argan oil or shea butter that will hydrate your strands without weighing them down. These products will lay the groundwork for long-lasting curls by ensuring your hair is properly moisturized and ready to hold its shape.
Once your hair is clean and prepped, it’s time to reach for a high-quality curl cream or mousse. These styling products are formulated specifically for curly hair, providing the right amount of hold and definition without leaving any sticky residue behind. Apply a generous amount of product to damp hair, then use a wide-tooth comb or your fingers to evenly distribute it from root to tip.
Now comes the crucial step – using the right tools. A diffuser attachment for your blow dryer is an absolute game-changer when it comes to achieving long-lasting curls. This attachment helps distribute heat more evenly throughout your hair while minimizing frizz, resulting in beautifully defined curls that last all day. Simply attach the diffuser to your blow dryer, flip your head upside down, and gently scrunch your hair in an upward motion as you dry. The diffuser will work its magic by enhancing your natural curl pattern while reducing damage caused by excessive heat.
Another must-have tool for long-lasting curls is a quality ceramic or tourmaline curling iron. These materials help distribute heat evenly across each section of hair, preventing any hot spots that could lead to unwanted frizz or damage. Opt for a curling iron with a barrel size that matches the look you’re going for – smaller barrels will create tighter curls, while larger ones will give you looser waves. Remember to always use a heat protectant spray before styling to shield your hair from unnecessary heat damage.
To ensure your curls stay put all day, finish off your styling routine with a long-lasting hairspray. Look for one that offers strong hold without leaving your hair feeling stiff or crunchy. A quick spritz of hairspray will help set your curls in place and guard against humidity or any external factors that could cause them to droop.
Now that you have the inside scoop on the best products and tools for long-lasting curled curly hair, it’s time to embrace those gorgeous, bouncy curls and rock them throughout the day. So say goodbye to limp locks and hello to fabulous, long-lasting curls that turn heads wherever you go. Trust us – these products and tools are the secret weapons every curly-haired individual needs in their arsenal!
Embracing Your Natural Curls: Enhancing and Defining with Curling Techniques
Title: Embracing Your Natural Curls: Enhancing and Defining with Curling Techniques
Introduction:
Natural curls are a unique and beautiful feature that many people struggle to embrace fully. In a world where straight hair often dominates the beauty standards, it’s time to celebrate our natural curls and explore ways to enhance and define them. In this blog post, we will dive into valuable tips, techniques, and clever tricks to help you embrace your natural curls like never before.
1. Understanding Your Curl Type:
Before delving into curling techniques, it’s crucial to understand your curl type. From loose waves (type 2) to tight coils (type 4), each curl type has its own requirements for enhancing and defining. Identifying your curl pattern will allow you to target specific techniques that work best for your unique locks.
2. Hydration is Key:
One of the biggest challenges faced by individuals with curly hair is achieving sufficient moisture. Curly hair tends to be more prone to dryness due to the natural shape of the strand preventing oils from easily reaching down its length. The key here is hydration! Regular deep conditioning treatments, using plant-based oils as leave-in conditioners, or incorporating moisturizing masks into your routine will nourish and revitalize your curls from within.
3. Embrace Your Wash Day Routine:
The foundation of any great curly hairstyle lies in a well-executed wash day routine. Start by choosing sulfate-free shampoos that won’t strip away essential oils from your scalp. Follow up with a moisturizing conditioner specifically formulated for curly hair, focusing on detangling gently with your fingers or a wide-toothed comb while the product is still in your locks. This step helps reduce frizz while maintaining those precious defined curls.
4. Product Selection Matters:
Tracking down suitable products can feel like searching for hidden treasures when it comes to styling curly locks effectively. Look for lightweight gels and creams that provide hold without weighing the hair down. Experiment with different products to find what suits your curls best, ensuring they remain moisturized and soft while maintaining their natural bounce.
5. Enhance Your Curls with Pineappling:
If you’re aiming for elongated, defined curls on day two or three, try the pineappling technique. Before bed, gather all your hair gently into a loose high ponytail on top of your head using a satin scrunchie or scarf. This method minimizes friction with the pillowcase, reducing frizz and preserving those gorgeous defined curls until morning.
6. Diffusing Over Air-Drying:
While air-drying is an excellent option for some, others may find it challenging to define their curls fully using this method alone. Enter the diffuser! This handy attachment for your blow dryer spreads heat evenly without disturbing your natural curl pattern. Apply a heat protectant spray before beginning and adjust your dryer to low or medium heat settings for optimal results. Flip your head upside down and gently cup sections of your hair within the diffuser, providing it with lift and definition while minimizing frizz.
Conclusion:
Embracing your natural curls is an empowering journey that requires patience and experimentation. By understanding our specific curl type, embracing hydration, perfecting our wash day routine, selecting suitable products, utilizing clever techniques like pineappling and diffusing; we can enhance and define our beautiful locks like never before. So let’s celebrate our unique textures proudly – because curly hair is beautiful hair!


