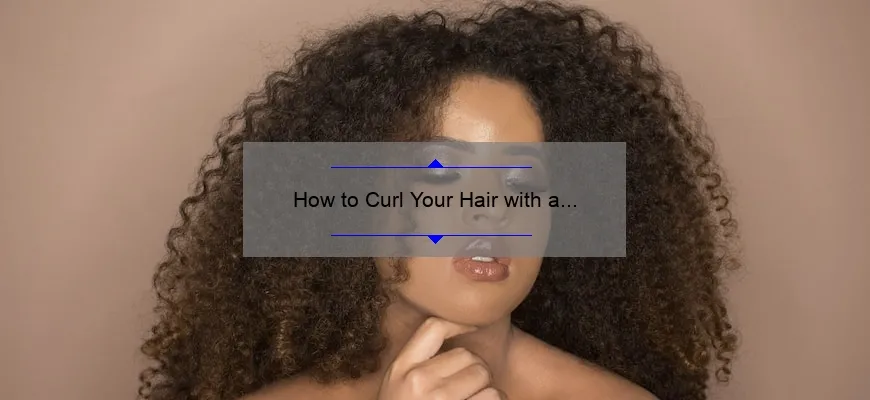
- Short answer how to curl your hair with a curling iron:
- Step-by-Step Guide: Learn How to Curl Your Hair with a Curling Iron
- Mastering the Art of Curling: Tips and Tricks for Using a Curling Iron
- Common Questions Answered: Your FAQ on How to Curl Your Hair with a Curling Iron
- The Right Tools for Perfect Curls: Essential Equipment for Curling Your Hair with an Iron
- Avoid These Mistakes: Top Don’ts When Curling Your Hair with a Curling Iron
- From Straight to Stunning: Transform your Hair with a Curling Iron
Short answer how to curl your hair with a curling iron:
Curling your hair with a curling iron involves these steps: 1. Start with clean and dry hair. 2. Divide your hair into sections. 3. Clamp the iron onto a section near the root. 4. Wrap the hair around the barrel, away from your face. 5. Hold for a few seconds and release. Repeat for other sections. Remember to use heat protectant and be cautious while handling hot tools to avoid injury or damage to your hair.
Step-by-Step Guide: Learn How to Curl Your Hair with a Curling Iron
Title: The Ultimate Styling Secret Unveiled: Mastering the Art of Curling Your Hair with a Curling Iron – Step-by-Step Guide
Introduction:
Welcome, dear styling enthusiasts! We’ve all been there – desperately longing for those luxurious bouncy curls that seem to effortlessly grace the heads of celebrities and influencers. Fear not, as we unveil the secret behind achieving picture-perfect curls with the trusty curling iron. Buckle up, grab your styling tools, and prepare for a step-by-step guide that will transform your hair game!
Step 1: Picking the Perfect Curling Iron:
Before diving into the art of curling, it’s imperative to find the right curling iron tailored to your hair type and desired result. Consider barrel size—the larger barrels create loose waves while smaller barrels deliver tight curls. Additionally, remember that ceramic or tourmaline barrels provide an even heat distribution for smoother results.
Step 2: Prep Your Hair for Success:
Preparation is key—never overlook this crucial step! Begin by washing and drying your hair thoroughly, ensuring no dampness remains. Applying a heat protectant spray is pivotal when it comes to shielding your precious locks from potential damage caused by excessive heat exposure.
Step 3: Divide and Conquer:
Divide your hair into manageable sections using clips or hair ties. Starting from one side of your head, separate strands neatly using vertical partings parallel to your face. This division ensures easier maneuverability while preventing any tangles along the way.
Step 4: Setting The Stage – Adjusting Heat Settings:
Every individual’s hair texture varies, so setting the appropriate temperature is essential. Generally, fine or thin hair requires lower heat settings (between 300-350°F) to prevent excessive damage. On the other hand, thicker or coarser hair types may necessitate higher temperatures (upwards of 400°F) for optimal curl formation.
Step 5: First Encounter – The Clamp and Wrap Technique:
Hold the curling iron with care, ensuring the barrel is facing downward. Take a strand of hair, approximately 1-2 inches wide, and position it between the clamps. Gently close the clamp to secure your hair in place while ensuring it’s not too tight to avoid leaving unwanted creases.
Now comes the fun part – wrap your hair around the iron’s barrel starting from the roots and working towards the ends. Avoid overlapping or overcrowding sections for even heat distribution and consistent curls. Hold each section for about 10-15 seconds before releasing.
Pro Tip: For more natural-looking curls, alternate curl directions by wrapping some strands away from your face and others toward it. This technique lends depth and helps achieve that coveted salon-worthy finish.
Step 6: Repeat and Stride Forward:
Continue this process throughout each section of your hair until you’ve conquered every strand on your head. Remember that practice makes perfect, so if it doesn’t meet expectations initially, don’t be disheartened! Experiment with various techniques until you find a style that suits you best.
Step 7: Polish Your Look:
As soon as all your desired curls have been achieved, wait for them to cool down slightly before running your fingers through gently—this action softens the curls while adding movement without sacrificing their longevity.
Finish off with a spritz of hairspray to ensure those gorgeous locks stay intact throughout your day.
Conclusion:
Voila! You’ve successfully unveiled the secrets behind achieving stunningly curled tresses using a curling iron. Equipped with our step-by-step guide, you can now confidently embrace endless styling possibilities right at home or wherever life takes you!
Remember, experimentation is key when mastering any hairstyle technique. Feel free to experiment with different products and innovative methods tailored to suit your unique needs. So go forth and conquer those enviable curls, stepping out with the confidence of a true styling maven!
Mastering the Art of Curling: Tips and Tricks for Using a Curling Iron
Welcome to our blog, where we are going to explore the wonderful world of curling irons. If you have always dreamed of achieving those luscious, bouncy curls that seem impossible to create at home, fret no more! We are here to share our expert tips and tricks on how to master the art of curling using a curling iron.
First things first, let’s talk about the essential tools you will need. Of course, the star of the show is your trusty curling iron. Choose one with a barrel size that suits your desired style – smaller barrels for tight curls or larger ones for loose waves. Heat protectant spray is another must-have item as it will shield your hair from heat damage and maintain its health and shine.
Now that we have all our tools in place, it’s time to dive into the technique. One common mistake people make is not preparing their hair properly before curling. Make sure your hair is clean and completely dry before starting. Use a brush or comb to detangle any knots, as this will ensure a smooth process.
Before diving straight into curling, apply a small amount of mousse or styling product evenly throughout your hair. This will give your curls some extra hold and longevity. Remember, a little goes a long way!
Proper sectioning is key when it comes to achieving uniform curls. Starting from the bottom layers, divide your hair into manageable sections using clips or hair ties. This method ensures that every strand gets equal attention and prevents any missed spots.
Next up is temperature control – one aspect often underestimated in achieving perfect curls without damaging your locks. Select an appropriate heat setting based on your hair type: lower for finer or damaged hair and higher for thick or coarse hair. Be cautious not to go overboard with the temperature though; excessive heat can lead to irreversible damage.
When curling individual sections of hair, wrap them around the barrel away from your face. This technique creates a more flattering and natural look, as opposed to curling towards your face which can often result in an outdated appearance reminiscent of the 80s.
To achieve that coveted beachy wave effect, alternate the direction of each curl. Curl some sections towards your face and others away, creating a varied and dimensional look. Remember to leave the ends out for a more modern twist – it adds a touch of elegance while keeping your curls from looking too uniform.
Now, let’s address the age-old question: should you brush out your curls? While some believe brushing curls results in frizz and unruly hair, there is a secret technique to maintain those perfect ringlets without compromising their definition. Once you finish curling, let your hair cool down for a few minutes. Then, use a wide-tooth comb or gently run your fingers through your hair to loosen the curls slightly while preserving their shape.
To seal the deal and ensure longevity, apply a light mist of hairspray all over your curls. This will help them stay intact throughout the day and resist humidity-induced frizz. Don’t be too heavy-handed with hairspray though; we want our curls to bounce freely!
Mastering the art of curling takes practice, but with these tips and tricks up your sleeve, you’ll be well on your way to becoming a curling pro! So channel your inner hairstyling magician and go forth confidently armed with your curling iron – those fabulous curls are waiting for you!
Common Questions Answered: Your FAQ on How to Curl Your Hair with a Curling Iron
Common Questions Answered: Your FAQ on How to Curl Your Hair with a Curling Iron
Curling your hair can be a daunting task, especially if you’re new to using a curling iron. With so many techniques and tools out there, it’s normal to have some burning questions about achieving those perfect curls. So, we’ve compiled a comprehensive FAQ guide just for you! Read on as we unravel the mysteries of curling your hair with a curling iron.
1. What size curling iron should I use?
Choosing the right barrel size is crucial to achieve your desired curls. For tight ringlets or defined waves, opt for a smaller barrel (around 0.5–1 inch). If you’re looking for loose, beachy waves or soft curls, go for a larger barrel (around 1–2 inches). Remember, the smaller the barrel, the tighter the curl!
2. How do I protect my hair from heat damage?
Before applying any heat to your precious locks, always remember to prep and protect! Start by applying a heat protectant spray evenly throughout your hair. This creates a barrier between your strands and the heated tool while locking in moisture. It’s also essential not to crank up the temperature too high – find that sweet spot where you can still achieve great results without scorching your strands.
3. Should I curl my hair towards or away from my face?
This depends on the look you want to achieve and which side of your face you’re working on. To frame your face beautifully, curl sections away from it towards the back of your head on one side and towards it on the other side—alternating directions helps create natural-looking curls that don’t stick together.
4. How long should I hold each section of hair around the curling iron?
The duration of holding each section will determine how tight or loose your curls are. As a general rule, hold each section for about 10-15 seconds. Remember, the longer you hold it, the tighter the curl will be. Experiment with different timings until you find what suits your desired style best.
5. My curls always fall flat within an hour—how can I make them last?
The key to long-lasting curls lies in proper styling techniques and setting them after curling. Once you release a curled section from the iron, gently cup it and secure it against your scalp using a bobby pin or a small hair clip. Allow your curls to cool completely while they’re pinned up. While this may seem silly, it helps set the shape of your curls and ensures they stay bouncy for hours.
6. What should I do if my hair keeps getting tangled around the curling iron?
First things first – take a deep breath! Tangles happen to all of us. To avoid this common frustration, ensure that each section of hair is properly combed before wrapping it around the barrel. Hold the ends of your hair taut as you wrap upwards to prevent any snags or tangles.
7. Can I use hairspray before or after curling?
Absolutely! Using hairspray before curling can give your hair added texture and grip, making it easier for the curls to hold their shape. However, we recommend using a light-hold hairspray rather than a heavy one to avoid weighing down your locks or leaving them stiff and crunchy.
8. Is there any way to achieve heatless curls with a curling iron?
While it might sound counterintuitive, yes, you can achieve heatless-looking curls with a curling iron! Simply wrap sections of hair around the barrel but leave some space between each loop so that only parts of the strand touch the heat source. This technique creates loose waves that mimic natural heatless styles effortlessly.
Curling your hair doesn’t have to be overwhelming; armed with the right knowledge and technique, you’ll be able to turn heads with your stunning curls. Remember to be patient, experiment, and embrace imperfections – because sometimes the most beautiful curls are the ones that come to life when you put your own spin on them!
The Right Tools for Perfect Curls: Essential Equipment for Curling Your Hair with an Iron
Have you ever dreamed of achieving those luscious, bouncy curls that seem to grace the heads of celebrities and models? Well, achieving perfect curls is not as elusive as it may seem. With the right tools in your arsenal, you can transform your straight or limp locks into stunning, head-turning curls! In this blog post, we will explore the essential equipment you need for curling your hair with an iron.
First and foremost, let’s discuss the star of the show—the curling iron itself. When selecting a curling iron, there are a few key factors to consider: barrel size, temperature control, and material. The barrel size determines the type of curls you’ll achieve—smaller barrels create tight ringlets while larger barrels give you voluminous waves. If you desire versatile styling options, opt for an iron with interchangeable barrels.
Temperature control is crucial because different hair types require different heat levels. Fine or damaged hair should be curled at lower temperatures to prevent unnecessary heat damage, whereas thick or coarse hair may need higher temperatures for effective styling. Look for a curling iron with adjustable temperature settings to cater to your specific needs.
Now comes the material of the curling iron barrel. Ceramic and tourmaline-infused barrels are popular choices due to their ability to distribute heat evenly throughout your hair while reducing frizz and static. This ensures consistent results and healthier-looking curls. Titanium barrels heat up quickly and provide even heat distribution as well but are a better option if you need intense heat for thicker hair.
Once you’ve selected your perfect curling iron, it’s time to think about additional tools that will enhance your curling experience. Heat protectant spray is an absolute must-have before subjecting your strands to any form of heat styling. This essential product forms a protective barrier on your hair cuticles and shields them from excessive damage caused by high temperatures.
Another tool that should not be overlooked is a good quality clip or clamp. This little helper will secure your hair in place while you curl, preventing any loose strands from escaping and creating a messy look. Look for a clip with a smooth surface to avoid any unwanted creases or marks on your perfectly styled curls.
If you struggle with tangled or unruly hair, investing in some sectioning clips can be a game-changer. These handy clips are ideal for dividing your hair into manageable sections, allowing for more precise and efficient curling. Plus, they keep the rest of your hair out of the way while you focus on styling each section—talk about multitasking!
Last but not least, don’t forget a high-quality heat-resistant glove. Curling irons can reach scorching temperatures that can potentially burn your skin if not handled properly. A heat-resistant glove provides an extra layer of protection and allows you to handle the iron fearlessly while maneuvering through your locks.
With these essential tools at your disposal, you’re now ready to embark on your curling journey! Remember to always start with clean and dry hair before applying any heat, as this ensures optimal results. Section off your hair into manageable portions using sectioning clips, apply a heat protectant spray generously, then let the curling iron work its magic. Take it slow and steady, wrapping small sections around the barrel for consistent curls throughout.
So there you have it—the ultimate guide to choosing the right tools for perfect curls! Armed with the right curling iron, heat protectant spray, clips, and a trusty heat-resistant glove—you’ll be well-equipped to achieve salon-worthy curls whenever inspiration strikes. So go ahead and embrace those stunning waves or bouncy ringlets that will leave everyone mesmerized by your fabulous hairstyles!
Avoid These Mistakes: Top Don’ts When Curling Your Hair with a Curling Iron
Avoid These Mistakes: Top Don’ts When Curling Your Hair with a Curling Iron
There’s no denying that beautifully curled hair can transform your look and elevate your overall style. It adds volume, texture, and an undeniable touch of elegance to any ensemble. However, achieving those flawless curls is not always as easy as it seems. Many individuals make some common mistakes when using a curling iron, resulting in less than desirable results.
To help you avoid these pitfalls and ensure flawless curls every time, we’ve compiled a list of top don’ts when curling your hair with a curling iron. Read on to learn how to sidestep these blunders and master the art of curling like a pro.
1. Don’t Skip Heat Protectant:
One of the biggest mistakes people make while curling their hair is skipping heat protectant products. Applying heat directly to your precious strands without protection can lead to dryness, damage, and even breakage over time. Invest in a good quality heat protectant spray or serum before you start styling. Not only will it shield your hair from the damaging effects of high temperatures, but it will also help hold those curls for longer-lasting results.
2. Don’t Forget About Sectioning:
Sectioning your hair properly is crucial for even and well-defined curls. Neglecting this step often leads to tangled messes or uneven curls that lack coherence. Take small sections at a time, clipping away the rest of your hair to keep things organized. This allows the heat from the curling iron to penetrate each section evenly while ensuring an easier styling process overall.
3. Don’t Overdo the Heat:
While it might be tempting to crank up the temperature setting on your curling iron for quick results, excessive heat can be incredibly damaging for your tresses. High temperatures can cause irreversible harm like split ends and brittle strands over time. Opt for medium heat settings and test it on a small section of hair first. If your curls form easily without excessive sizzle or burning smells, that’s the level you should stick to.
4. Don’t Hold Onto the Curling Iron for Too Long:
A common mistake many people make is leaving their hair wrapped around the curling iron for too long. This can result in either super tight, unnatural-looking curls or worse, heat damage. Ideally, you should aim to hold each section around the curling iron for about 8 to 10 seconds before releasing it. If you find that your curls tend to fall apart quickly after styling, consider using smaller sections or try holding them slightly longer.
5. Don’t Ignore Your Hair’s Natural Texture:
Understanding your hair’s natural texture is vital when curling with a curling iron. While it’s tempting to force those intricate ringlets upon your locks, this can often lead to disappointment and frustration. Instead, work with your hair’s natural texture by choosing the right barrel size for your desired outcome. For finer hair types, opt for a smaller barrel to add volume and definition while avoiding overpowering your strands altogether.
6. Don’t Forget Final Touches:
To ensure that your stunning curls last all day or night, don’t forget the finishing touches! Applying a lightweight hairspray, like a flexible hold one, will help set and lock in those beautiful curls without weighing them down or making them feel stiff. Additionally, gently run your fingers through your newly styled curls once they have cooled down to separate them slightly for a more effortless and natural look.
By following these top don’ts when curling your hair with a curling iron, you’ll be well on your way to achieving gorgeous salon-worthy curls every time. Remember: protect before you style, section properly, regulate heat levels responsibly, time each section accordingly, respect your hair’s texture and finish off with finesse! Now, go forth, have fun and embrace those stunning curls with confidence!
From Straight to Stunning: Transform your Hair with a Curling Iron
From Straight to Stunning: Transform your Hair with a Curling Iron
Are you tired of the same old straight hair look? Looking for a way to switch up your style and add some volume and bounce to your locks? Look no further than the trusty curling iron! With this amazing tool at your disposal, you can easily transform your hair from straight and lifeless to stunning and full of personality.
The curling iron has been a staple in every hair enthusiast’s arsenal for years, and it’s not hard to see why. Its ability to create beautiful curls, waves, or even just add texture is unmatched. But before you dive into the world of curling irons, let us guide you through the process step by step, so you can achieve salon-worthy results without a hitch.
First things first, choosing the right curling iron is crucial. Consider the size of the barrel – larger barrels create looser curls while smaller ones produce tighter ones. This will depend on your personal preference and desired hairstyle. Do you want those glamorous Hollywood waves or playful beachy curls? The choice is yours!
Next up is prepping your hair. Always start with clean, dry strands that are free from any product build-up. Use a heat protectant spray or cream to shield your hair from damage caused by high temperatures. Remember: healthy hair is happy hair!
Now it’s time to get down to business. Divide your hair into sections for easier manipulation. Clip up most of it, leaving one section loose at a time to work on. Start from the bottom layers and gradually move upwards towards the top.
Take a small section of hair (about an inch wide) and wrap it around the barrel of the curling iron away from your face. Hold it for about 10-15 seconds (adjust based on how tight you want your curls), then release gently. Repeat this step until all sections have been curled.
Once your hair is fully curled, don’t rush to admire your stunning new look just yet. Allow the curls to cool down for a few minutes before giving them some love. This will help set the curls and ensure they last longer.
Finally, it’s time for the grand finale: styling! To achieve a natural-looking, voluminous effect, gently brush through your curls with a wide-tooth comb or use your fingers to separate and tousle them. Remember not to go overboard; we want those effortless waves, not a frizzy mess!
To set everything in place and add that touch of professional finesse, finish off with some hairspray or texturizing spray. This will help hold the curls and provide long-lasting results throughout the day.
Now you’re ready to rock those stunning new locks wherever you go! Whether it’s for a special occasion or just a random Tuesday when you want to feel fabulous, mastering the curling iron technique will give you endless hairstyling options.
So say goodbye to dull straight hair and hello to beautifully transformed tresses! With a curling iron in hand and these tips up your sleeve, there’s no limit to the amazing hairstyles you can create. Get ready to turn heads and prepare for compliments galore because from straight to stunning is just one curl away!


