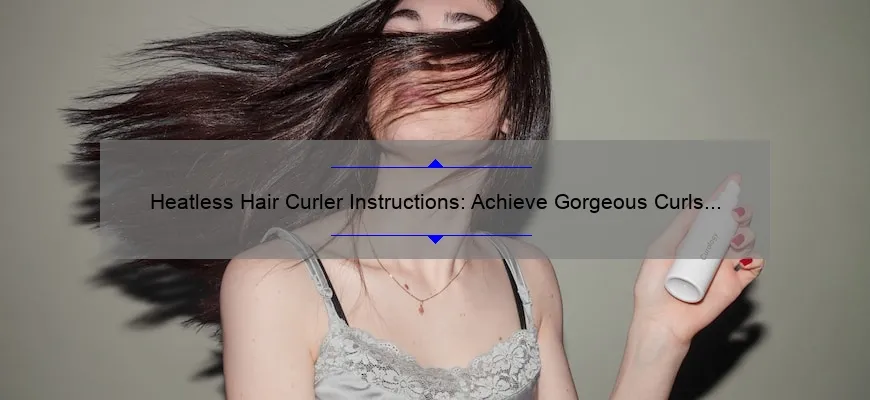
- Short answer heatless hair curler instructions:
- How to Use Heatless Hair Curler: Step-by-Step Instructions
- Top Tips for Perfectly Curled Hair with Heatless Hair Curlers
- Frequently Asked Questions About Heatless Hair Curler Instructions
- Achieving Long-Lasting Curls: Follow These Heatless Hair Curler Instructions
- Do’s and Don’ts of Using a Heatless Hair Curler: Essential Instructions to Know
- Master the Art of Heatless Hair Curling: A Comprehensive Guide with Step-by-Step Instructions
Short answer heatless hair curler instructions:
Heatless hair curlers are a styling tool that creates curls without the use of heat. To achieve beautiful curls, follow these instructions: 1. Start with clean, dry hair 2. Divide your hair into sections 3. Take one section and wrap it around the curler from end to root 4. Secure the curler in place and repeat with other sections 5. Leave the curlers in for several hours or overnight 6. Gently remove the curlers and enjoy your heatless curls!
How to Use Heatless Hair Curler: Step-by-Step Instructions
Title: Effortlessly Chic Locks: Mastering Heatless Hair Curlers in a Few Simple Steps
Introduction:
In the realm of hairstyling, achieving glamorous curls has typically required heat tools that can leave our precious locks damaged and brittle over time. Thankfully, the invention of heatless hair curlers has revolutionized the way we curl our hair, offering a gentler alternative without sacrificing style. In this comprehensive guide, we’ll walk you through step-by-step instructions on how to use a heatless hair curler to achieve beautiful curls that are as protective as they are eye-catching.
Step 1: Gather Your Tools
Before diving into the curling process, make sure you have all your tools at hand. You will need:
– A high-quality heatless hair curler set (such as foam rollers or flexi rods) suitable for your hair length and desired results.
– A wide-tooth comb for detangling and separating sections.
– Setting lotion or spray to enhance hold and extend durability.
– Hairpins or clips to secure each roll in place.
Step 2: Wash and Prep Your Hair
For optimal results, it’s important to start with freshly washed and conditioned hair. Gently towel-dry your strands until they’re slightly damp but not dripping wet. Apply a lightweight setting lotion evenly throughout your hair for added manageability and hold while also protecting against frizz.
Step 3: Section Your Hair
Divide your damp hair into several manageable sections using clips or pins. Start by parting it horizontally and securing the upper half with clips so you can work on one portion at a time. If necessary, create additional vertical sections based on your desired level of volume.
Step 4: Detangle and Roll
Starting with an individual section from the bottom layer, use a wide-tooth comb to gently detangle any knots or tangles. Then, take a small segment of hair (approximately 1-2 inches wide) and begin rolling it onto the heatless hair curler.
For foam rollers, begin at the ends and roll upwards towards the roots, securing the roller in place with a provided clip or fastening mechanism. Flexi rods can be used by wrapping sections of hair around them, similar to curling a ribbon around a pen. Be sure to roll each section tightly enough to create defined curls but not too tight to avoid discomfort.
Step 5: Repeat Until Complete
Continue working through each section until all your hair is rolled up neatly in heatless hair curlers. Remember to vary the direction of each curl for added dimension – alternate between rolling sections towards and away from your face.
Step 6: Allow Time for Setting
After completing all the rolls, let your curls set undisturbed for an extended period (typically overnight) or as per the instructions specific to your chosen heatless hair curler set. The longer you leave them in, the tighter and longer-lasting your curls will become.
Step 7: Unroll and Style
Once the designated setting time has passed, remove each heatless hair curler carefully. Take your time unrolling each one gently without tugging on them excessively. Avoid running your fingers through your newly formed locks too much, as this can disrupt their shape or create unwanted frizz.
Step 8: Finish with Finesse
To achieve a polished look that lasts, lightly mist your curls with a flexible hairspray or texturizing spray. Use your fingers to separate and fluff individual curls gently for desired volume and texture. If needed, use bobby pins or small clips strategically hidden within your hairstyle to fix any unruly strands.
Conclusion:
Congratulations! You have successfully mastered how to use heatless hair curlers from start to finish. By following these step-by-step instructions religiously, you can confidently rock luscious waves without exposing your hair to excessive heat and potential damage. Remember to experiment with different sizes, techniques, and styling products to achieve the perfect curl that showcases your unique flair. Get ready to dazzle with effortlessly chic locks that garner compliments wherever you go!
Top Tips for Perfectly Curled Hair with Heatless Hair Curlers
Achieving perfectly curled hair can seem like an impossible task, especially if you don’t want to damage your locks with excessive heat. However, there is a magical solution that will help you achieve those gorgeous curls without using any heat at all — heatless hair curlers! These innovative tools are designed to give you stunning curls while keeping your hair healthy and protected. So, if you’re ready to rock some fabulous curls without the damaging effects of traditional curling irons or hot rollers, read on for our top tips on how to use heatless hair curlers.
1. Choose the Right Curlers: The key to achieving flawless curls lies in selecting the right type of heatless hair curler for your hair texture and desired style. There are several options available, such as foam rollers, flexi rods, or even twist-flex rods. Foam rollers work well for medium to long lengths of hair and provide bouncy, voluminous curls. On the other hand, flexi rods are perfect for creating spiral or tight ringlet curls on various lengths of hair.
2. Preparation is Key: Before diving into the world of heatless curling, it’s important to prep your damp or slightly dry hair properly. Start by gently detangling your locks using a wide-tooth comb or brush from ends to roots to ensure smoothness and avoid breakage. Once detangled, apply a lightweight styling product such as a mousse or leave-in conditioner evenly throughout your hair to enhance hold and manageability.
3. Section It Up: To maximize efficiency and achieve uniform curls, divide your hair into manageable sections before starting the curling process. This will make it easier for you to work with smaller portions of hair and wrap them around the curlers individually. Simply clip away the sections you’re not working on using sectioning clips or bobby pins – this technique helps speed up the process while ensuring each strand gets equal attention.
4. Wrap and Roll: Now it’s time to get creative with your curlers! Take a section of hair, approximately one to two inches wide, and start rolling it onto the curler from the ends towards the roots. Make sure to keep the curler tight but not too tight to avoid discomfort or damage. If you want more volume, roll your hair towards your scalp; for looser waves, roll away from it. Repeat this process until all sections of your hair are wrapped securely around the curlers.
5. Let Them Set: After successfully curling your entire head, let the magic happen by allowing your hair to air dry or sleep on them overnight. The duration will depend on your hair type and desired results; typically, leaving them in for a few hours or overnight ensures beautiful curls that last longer. This is an excellent opportunity to catch up on some beauty sleep while anticipating stunning locks in the morning!
6. Unveiling Gorgeous Curls: Once you’ve given them enough time to set, carefully unravel each curler starting from the bottom layer of your hair working upwards, gently teasing out those fabulous curls. Avoid rushing this step as tugging or pulling may cause frizz or disrupt the shape of the curls you’ve created.
7. Lock It In with Product: To make those curls go the extra mile throughout the day, finish off with a lightweight hairspray or texturizing spray designed specifically for curly hair. These products will help hold those stunning curls in place without weighing them down or making them feel sticky.
Now that you have armed yourself with these top tips for achieving perfectly curled hair with heatless hair curlers, say goodbye to damaging heat tools and embrace these creative alternatives! You’ll be flaunting envy-worthy curls while keeping your tresses healthier than ever before – a win-win situation for any hairstyle enthusiast!
Frequently Asked Questions About Heatless Hair Curler Instructions
Title: Frequently Asked Questions About Heatless Hair Curler Instructions – Unlocking the Secret to Effortlessly Beautiful Curls!
Introduction:
If you’ve ever struggled with achieving those luscious curls without using damaging heat styling tools, worry no more! Heatless hair curlers are here to transform your hair routine. However, like any new tool or technique, questions can arise. In this blog, we’ll dive into frequently asked questions about heatless hair curler instructions, providing detailed professional advice with a touch of wit and cleverness. So let’s unravel the mysteries behind these innovative hairstyling wonders!
1. How do heatless hair curlers actually work?
Heatless hair curlers utilize gentle techniques to create curls without relying on high temperatures or chemicals. Typically made from soft and flexible materials such as foam or fabric, these curlers allow your damp or dry hair to mold around them. As you secure the curls in place, they gradually take shape with time, producing beautiful and lasting results.
2. Can heatless hair curlers be used on all types of hair?
Absolutely! Whether you have fine, thick, straight, wavy, or curly hair—heatless hair curlers can work their magic for everyone. Just bear in mind that different types of curlers may achieve varying results depending on your specific hair texture and length.
3. How long should I keep the heatless hair curlers in my hair?
The duration will vary depending on the style desired and the type of curler used. Generally speaking, leaving them in overnight guarantees bouncy and defined curls by morning. However, some individuals find success with shorter periods ranging from 30 minutes to a couple of hours.
4. Can I use heatless hair curlers on dry or wet hair?
Both options are possible! The results will slightly differ based on whether your strands are dry or damp when wrapping them around the curler. Applying heatless curlers to wet hair tends to provide tighter and longer-lasting curls. Meanwhile, using them on dry hair yields looser and more relaxed waves.
5. How can I make my heatless curls last longer?
To extend the lifespan of your heatless curls, consider applying a setting spray or mousse before removing the curlers. This helps set the shape while providing extra hold. Additionally, sleeping with silk or satin pillowcases can prevent frizz and maintain smoothness for an extended period.
6. Is it possible to create different types of curls using heatless hair curlers?
Absolutely! Although they may not offer as vast a range as traditional hot tools, you can still achieve multiple styles with heatless hair curlers. Larger barrel-shaped curlers produce loose waves, while smaller ones yield bouncy ringlets or tight curls. Experimenting with various sizes will help you discover the perfect style for any occasion.
Conclusion:
Now armed with answers to frequently asked questions about heatless hair curler instructions, you’re ready to embark on your journey towards effortless and damage-free curls! Remember to embrace experimentation and find what works best for your hair type and desired look. So bid farewell to harmful heated styling tools and say hello to stunning curls brought to life by these innovative wonders. Unleash your inner hairstyling guru today!
Achieving Long-Lasting Curls: Follow These Heatless Hair Curler Instructions
Have you ever dreamt of achieving long-lasting curls without having to expose your hair to damaging heat? Well, look no further! We have the perfect solution for you – heatless hair curlers. These magical tools not only protect your precious locks from excessive damage but also allow you to create stunning curls that will last all day long. Follow these heatless hair curler instructions and get ready to rock those enviable waves effortlessly!
First things first, let’s gather our supplies. You’ll need a set of high-quality heatless hair curlers, a styling product such as mousse or hairspray, and a few clips or bobby pins. It’s important to invest in good curlers because cheap ones may not provide optimal results and can cause unnecessary tangles.
To prepare your hair for the curling process, wash and condition it as usual. Towel dry gently until it’s damp but not dripping wet. Applying a small amount of mousse can help enhance the longevity of your curls while adding extra volume to your hair.
Once your hair is prepped, divide it into sections. The number of sections depends on how thick or thin your hair is, but typically dividing it into 4-6 sections works well for most people. Use clips or bobby pins to keep each section separate – this will make the curling process much more manageable.
Now comes the fun part – applying the heatless hair curlers! Take one section of hair at a time and wrap it around the roller starting from the ends and working upwards towards the roots. Make sure to roll tightly for tighter curls or loosely for more natural waves depending on your desired look.
Secure each curler in place by either using built-in clasps or attaching them with clips provided with the curling set. Ensure that they are secure enough not to unravel during the drying process yet comfortable enough not to cause any scalp discomfort.
With all your lovely locks now wrapped up, it’s time to let them dry naturally. This is where patience comes into play. The longer you can leave the hair curlers in, the better your results will be. It’s recommended to allow your curls to set overnight, so you can sleep on them and wake up with gorgeous waves, but if you’re tight on time, letting them air dry during the day for at least a few hours will suffice.
Once your hair is completely dry, carefully remove each curler by unwinding it from your hair in the same direction as you rolled it in. Take your time to avoid any potential snags or tangles. As each curler comes out, marvel at the beautiful curls that reveal themselves – bouncy and full of life!
To enhance the longevity of your curls, lightly mist some hairspray over them to help lock in the shape and fight frizz throughout the day. Gently tousle your curls with your fingers or use a wide-toothed comb to create a more relaxed and effortless look.
Voila! You have successfully achieved long-lasting curls without exposing your hair to damaging heat! Not only did this method protect your locks but also allowed you to create stunning curls effortlessly. Rock those envy-inducing waves confidently all day long!
In conclusion, achieving long-lasting curls with heatless hair curlers is not only possible but also highly beneficial for maintaining healthy hair. By following these instructions and using high-quality curlers along with styling products like mousse or hairspray, you can transform your locks into gorgeous curly tresses that will turn heads wherever you go! So say goodbye to excessive heat damage and hello to fabulous curls that last!
Do’s and Don’ts of Using a Heatless Hair Curler: Essential Instructions to Know
Title: Mastering the Art of Heatless Hair Curling: Your Comprehensive Guide to Dos and Don’ts
Introduction:
Ah, the allure of perfectly curled hair! While heat styling tools are popular for achieving luscious waves, those who are seeking a gentler approach turn to heatless hair curlers. These ingenious inventions allow you to style your tresses without subjecting them to damaging heat. To ensure your curling endeavors go smoothly, we’ve compiled a comprehensive list of do’s and don’ts for using a heatless hair curler. Follow these essential instructions, and you’ll be well on your way to achieving glorious curls without frying your mane!
Do’s:
1. Begin with clean, dry hair: It’s crucial to start with clean and completely dry locks before using any type of hair curler, including heatless ones. Damp or wet strands will not offer desirable results, as they won’t hold the shape.
2. Use high-quality heatless hair curlers: Invest in a good set of heatless hair curlers made from materials like foam or fabric that gently wrap around your strands. These provide better grip while minimizing damage.
3. Section your hair: Divide your hair into manageable sections before starting the curling process. This ensures even distribution and helps create uniform curls.
4. Prep your strands: Apply a small amount of lightweight mousse or styling product suitable for curls evenly throughout your damp/wet hair for enhanced hold and definition.
5. Wrap carefully: Take one section of hair at a time and wrap it around the curler starting from the ends up towards the roots. Secure it in place by fastening or tying together the ends of the curler.
6. Leave them alone: Once all sections are wrapped up neatly in their respective curlers, resist any temptation to disturb them prematurely! Allow adequate time for natural air drying or follow manufacturer guidelines regarding recommended waiting times.
7. Gently unravel: When the suggested time has passed, slowly and carefully unwrap each curler to reveal your stunning heatless curls. Lightly finger-comb or use a wide-toothed comb for a more natural, voluminous look.
Don’ts:
1. Apply on dirty hair: Applying heatless curlers on dirty hair laden with oils and product build-up can yield lackluster results. Always start with freshly washed tresses for optimal styling.
2. Overload your hair: Remember, less is more! Resist the urge to overload your strands with excessive styling products as this can weigh down your curls and hinder their formation.
3. Rush the process: Give your hair ample time to dry while wrapped in the curlers. Hastily removing them prematurely may result in flat, unruly hair that falls short of achieving those enchanting waves you desire.
4. Tug or yank at the curlers: Avoid forcefully pulling out the curlers when unwrapping them from your hair; instead, be gentle and unwind them carefully to avoid potential damage or unnecessary tangling.
5. Underestimate maintenance: Just because you opted for heatless curls doesn’t mean you can neglect necessary maintenance routines! Protect your beautiful curls by using suitable serums or sprays designed for maintaining curly hairstyles, as they help prevent frizz and maintain shape throughout the day.
Conclusion:
Heatless hair curling offers a wonderful alternative to traditional heat styling methods by providing stunning results without compromising your locks’ health. By following these do’s and don’ts of using a heatless hair curler, you’ll achieve those captivating curls you’ve always desired while keeping damage at bay. Remember to embrace patience during the process, treat your tresses gently, and let those beautiful heat-free curls speak volumes about your impeccable sense of style!
Master the Art of Heatless Hair Curling: A Comprehensive Guide with Step-by-Step Instructions
Title: Master the Art of Heatless Hair Curling: Your Ultimate Guide to Achieving Effortlessly Gorgeous Locks
Intro:
Are you tired of continuously exposing your hair to damaging heat styling tools? Are you seeking a simpler and healthier alternative to achieve those luscious curls without causing harm? Look no further! In this comprehensive guide, we will unveil the secrets behind mastering the art of heatless hair curling. Get ready to unleash your inner hairstyling wizard as we provide step-by-step instructions that ensure stunning, long-lasting curls without risking your precious locks.
Chapter 1: Understanding Heatless Hair Curling
Before diving headfirst into the world of heatless hair curling, it’s essential to grasp the fundamentals. We’ll discuss why heatless options are better for your hair‘s health and outline how specific methods work their magic. With this knowledge in hand, you’ll feel confident making informed choices about which techniques best suit your needs and desired style.
Chapter 2: Embrace The Tools of The Trade
Though we won’t need any scalding hot tools for our journey towards marvelous curls, there are still a few key items worth acquiring. From soft fabric-based curlers to flexi-rods or simply socks (!), we reveal various ingenious tools that have proven remarkably effective at creating stunning curls without compromising hair health.
Chapter 3: Prep For Success – Perfect Preparation is Key!
Achieving flawless results starts with proper preparation. In this chapter, we’ll walk you through crucial prepping steps that lay the foundation for bouncy and defined curls. From washing techniques using enriching products suitable for your hair type to optimal drying approaches, guarantee a seamless start to your heatless curling adventure!
Chapter 4: Techniques Unveiled – Mega Waves & Glamorous Curls
Now let’s get down to business! Inside this chapter lies an array of tried-and-tested techniques that deliver diverse styles to suit any occasion. From mesmerizing mega waves that command attention to glamorous curls worthy of any red carpet event, we’ll provide step-by-step instructions for achieving each desired curl type. Prepare to be awe-struck by the versatility and ease of heatless hair curling techniques!
Chapter 5: Making Curls Last – Lock In The Magic
No one wants their perfectly fashioned curls to unravel within minutes or hours of creating them. Fear not, dear reader! In this chapter, we divulge invaluable tips and tricks to extend the lifespan of your heatless curls. Learn how to secure your locks with various setting methods and discover secret weapons like hairsprays and styling products that ensure long-lasting hold.
Chapter 6: Beyond Curls – Exploring Heatless Hairstyling
Although our focus has been on heatless hair curling, this chapter offers an exciting twist by exploring different hairstyles attainable using these techniques. Curious about updos, braids, or even trendy half buns? We’ve got you covered! Unleash your creativity as we guide you through achieving stunning heatless hairstyles that will leave everyone around you in awe.
Conclusion:
Congratulations! By immersing yourself in this comprehensive guide, you have unlocked a world of possibilities for effortlessly beautiful hair without relying on damaging heat tools. Armed with expert knowledge and step-by-step instructions, you’re now equipped to take charge of your hairstyling destiny—making every day a good hair day while preserving the vitality and health of your precious strands.
Remember, mastering the art of heatless hair curling requires practice and patience. Embrace experimentation and enjoy the journey towards hairology greatness—the rewards will be worth it! So go ahead—try these techniques, experiment with various styles, and let your natural beauty shine through in magnificent, head-turning curls that are sure to leave everyone speechless.


