- Short answer: How do you curl hair with a straightener?
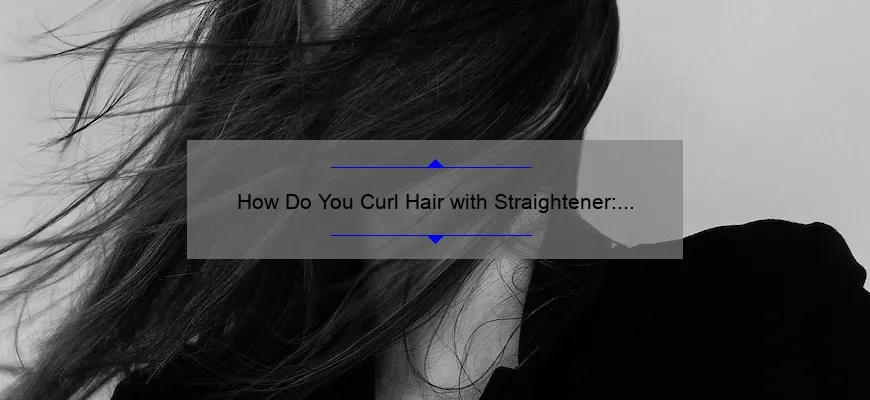
- How to Curl Hair with a Straightener: A Step-by-Step Guide
- Master the Art of Curling Hair with a Straightener: Step-by-Step Tutorial
- FAQs Answered: How Do You Curl Your Hair with a Straightener?
- Achieve Gorgeous Curls with a Hair Straightener: Step-by-Step Instructions
- Unlock the Secrets of Curling Hair with a Straightener: Essential Steps Revealed
- Curly hair made easy! Learn how to curl your hair using a straightener
Short answer: How do you curl hair with a straightener?
Curling hair with a straightener involves sectioning your hair, clamping the straightener near the roots, twisting it down, and sliding it along the length. Repeat for all sections to achieve desired curls. Use heat protectant and let curls cool before styling them.
How to Curl Hair with a Straightener: A Step-by-Step Guide
No worries if you don’t have a curling iron at hand! Did you know that you can achieve beautiful curls using a straightener? Yes, that’s right – your trusty flat iron can do more than just straighten your locks. In this step-by-step guide, we’ll show you how to curl hair with a straightener and become the envy of all your friends.
Step 1: Prepare and Protect
Before diving into the curling process, it’s essential to prepare your hair. Apply a heat protectant spray thoroughly from roots to ends. This will help shield your precious strands from heat damage caused by styling tools. Give it a few moments to dry before proceeding to the next step.
Step 2: Section Your Hair
Divide your hair into manageable sections using clips or hair ties. The number of sections depends on how thick your hair is. If you have thin hair, around three sections should suffice. For thicker manes, aim for four or five sections.
Step 3: Start with the Bottom Layer
Begin with the bottom layer of one section at a time for smoother results. Release one section and brush through it to ensure there are no tangles or knots. Keep in mind that smaller sections will create tighter curls, while larger ones will give looser waves.
Step 4: Clamp and Flip
Take a small section of hair and clamp the flat iron near the roots as close as possible without burning yourself. Gently rotate the iron away from your face by 180 degrees while gliding down towards the ends of the strand. This flipping motion is crucial for achieving those perfect curls.
Step 5: Adjust Direction
To create a more natural-looking effect, alternate between flipping the straightener away from your face and towards it with each consecutive section. This variation in direction adds dimension and prevents all of your curls from falling in one direction.
Step 6: Maintain Consistency
As you move on to the next sections, be mindful of maintaining consistent temperature and timing. Keeping the heat level and curling time similar throughout your hair will ensure a uniform look.
Step 7: Allow Curls to Cool
After curling a section, release it gently without disturbing its shape. Allowing the curls to cool completely before touching them helps set their form and longevity. Resist the temptation to run your fingers through just yet!
Step 8: Repeat and Switch Sides
Continue steps 3 to 7 for all remaining sections until you’ve successfully curled your entire head. Once the one side is complete, switch over to the other side and repeat the process.
Step 9: Shake it Out
Now that all of your hair has been curled, tilt your head forward slightly and give it a gentle shake. This will loosen up the curls for a more natural bounce while maintaining their structure.
Step 10: Lock in Your Look
To finish off this glamorous style, apply a lightweight hairspray or texturizing spray that will hold your curls in place without weighing them down. Avoid using excessive amounts as it can make your hair stiff or sticky.
There you have it – gorgeous curls achieved effortlessly with nothing but a trusty straightener! With practice, you’ll perfect this technique and create beautiful curls whenever you desire. So say farewell to boring straight hairstyles – embrace versatility with some fabulous curly locks!
Master the Art of Curling Hair with a Straightener: Step-by-Step Tutorial
Master the Art of Curling Hair with a Straightener: Step-by-Step Tutorial
Are you tired of using a traditional curling iron and looking for a new way to achieve those flirty, bouncy curls? Look no further than your trusty hair straightener! That’s right, you can actually use a straightener to create gorgeous curls that will turn heads wherever you go. In this step-by-step tutorial, we will show you how to master the art of curling hair with a straightener like a true professional.
Step 1: Start with Preparation
Before starting any styling process, it is crucial to prepare your hair properly. Begin by washing and conditioning your hair with products suitable for your hair type. Once washed, gently towel-dry your locks and apply a heat protectant spray evenly throughout. This important step creates a barrier between your precious strands and the direct heat from the straightener.
Step 2: Section Like a Boss
To ensure an even curling process and prevent any confusion later on, divide your hair into manageable sections using clips or hair ties. Start by separating the top section from the bottom section at ear level. Then, split each section in half horizontally, creating four sections total.
Step 3: Say Hello to Your Straightener
Now that your preparation is complete let’s move on to the main event – using your straightener as a curling tool! Ensure that your straightener is fully heated before proceeding. Take about one-inch wide subsections of hair for optimal results.
Step 4: The Magic Begins
Place the section of hair between the plates of the straightener near the root area while keeping it positioned diagonally away from your face. Twisting your wrist inward once, start gliding down slowly towards the ends in one smooth motion. This slight twisting motion helps create that coveted spiral effect.
The key here lies in finding the perfect balance between applying enough pressure to smoothly glide the straightener but not too much as it can create unwanted creases or flatness. Practice makes perfect, so don’t worry if you need a few tries to get the hang of it.
Step 5: Repeat and Move On
Continue this technique throughout all the sections of your hair, working your way from one side to the other. Remember, consistency is essential – keep each subsection at the same angle and twist direction for a harmonious curl pattern.
Step 6: Cool Down and Set
Once you have curled all your hair, it’s time for the curls to cool down and set. Allow them to rest undisturbed until they are completely cooled. This step is vital in ensuring long-lasting results for those fabulous curls.
Step 7: Unleash Your Inner Diva
After patiently waiting for your curls to cool, you’re ready to unleash your inner diva! Gently run your fingers through your waves or use a wide-toothed comb for a softer effect. If desired, finish off with a spritz of hairspray to hold everything in place all day or night long.
Now that you’ve mastered the art of curling hair with a straightener, be prepared to receive compliments left and right! No more fussing with multiple styling tools when one trusty straightener can do wonders. With practice and experimentation, you’ll be able to achieve versatile styles ranging from beachy waves to tight ringlets effortlessly.
So go ahead, grab that hair straightener lying around in your drawer and unlock its true potential – giving you salon-quality curls right at home!
FAQs Answered: How Do You Curl Your Hair with a Straightener?
Welcome back, ladies and gents! Today, we’re tackling one of the most frequently asked questions in the world of hairstyling: “How do you curl your hair with a straightener?” We totally get it; sometimes you want those luscious, bouncy curls without the hassle of lugging around multiple heat-styling tools. Luckily for you, we’ve got all the tips and tricks to create fabulous curls using just your trusty straightener. So grab your flat iron and let’s dive in!
Prepare your tresses:
Before diving into the curling process, ensure that your hair is clean and dry. Applying a heat protectant spray will shield your precious locks from any potential damage caused by styling tools. Gently detangle your hair with a comb to remove any knots or snags. Now that our hair is prepped and protected, let’s move on to some techniques.
The Classic Spiral Curl:
Let’s start with the timeless spiral curl – a go-to style for those red carpet events or special occasions.
1. Divide and conquer: Begin by sectioning off your hair into manageable sections – this will depend on how thick or thin your locks are.
2. Grab a strand of hair: Taking about an inch-wide section of hair (smaller if you desire tighter curls), clamp it between the straightener plates near its roots.
3. The twist begins: Slowly rotate the straightener 180 degrees away from your face while gliding down towards the ends of that section.
4. Keep twisting: Continue twisting every section of hair away from your face until you’ve curled all desired sections.
Pro tip: For more natural-looking curls, alternate between curling some sections towards your face while others away from it.
Beachy Waves:
Are you longing for those effortless beachy waves? With a few simple adjustments to our technique, we’ll have you nailing this laid-back style in no time!
1. Adjust your grip: Instead of clamping the straightener near the roots, begin about halfway down the strand.
2. Twist and glide: With a firm grip, twist the straightener away from your face once and then smoothly glide it down towards the ends.
3. Shake it up: Once you’ve curled all sections, gently run your fingers through your hair to break up the curls for that tousled, beachy effect.
Tight Ringlet Curls:
For those looking to achieve tight ringlets or cute corkscrew curls, here’s how you can master this adorable style with just a straightener.
1. Smaller sections are key: Take smaller strands of hair (around half an inch) for creating tighter curls.
2. The wrap-around technique: Clamp the straightener near the roots and begin wrapping each section around the flat iron without releasing tension until you reach the ends.
3. Slide out carefully: As you approach the end of each strand, carefully slide out the straightener while maintaining a gentle grip to hold its shape.
Finishing touches:
To make your curls last longer and add that extra polish, spritz your masterpiece with some lightweight hairspray or texturizing spray. Scrunching them gently with your hands will create soft movement as well.
So there you have it – using a straightener to curl your hair is not only possible but also incredibly versatile! Whether you’re going for classic spirals, boho waves, or tight ringlets, armed with these techniques and a little practice, stunning results are just a few twists away. Be bold; experiment with different styles till you find what works best for you. Remember to always prioritize protecting your lovely locks from heat damage by using high-quality styling products and regulating temperature settings on your straightener.
Happy curling!
Achieve Gorgeous Curls with a Hair Straightener: Step-by-Step Instructions
Title: Master the Art of Curling Your Hair with a Hair Straightener: Foolproof Step-by-Step Guide
Introduction:
Are you tired of spending hours wrestling with curling irons or juggling various hair tools to achieve those perfect curls? Well, fret no more! With a little practice and the right technique, you can create stunning curls using a simple tool that’s probably already in your beauty arsenal – your trusted hair straightener. In this step-by-step guide, we’ll walk you through the process of achieving gorgeously defined curls using a hair straightener. So, grab your straightener and let’s get started!
Step 1: Prepare Your Hair
Before diving into creating fabulous curls, it is crucial to prep your hair properly. Start by washing and conditioning your locks with products suitable for your hair type. Once out of the shower, gently towel-dry your hair without rubbing too vigorously to avoid unnecessary damage.
Step 2: Protect Your Tresses
To shield your strands from heat damage and ensure a long-lasting style, apply a heat protectant spray evenly throughout your damp or dry hair. This essential step will not only prevent excess breakage but also keep frizz at bay while locking in moisture.
Step 3: Section Your Hair
Next, divide your mane into manageable sections using clips or hair ties. By working in smaller portions, you guarantee better control over the styling process while avoiding any tangles or missed spots.
Step 4: Adjust the Temperature
Now it’s time to set the temperature on your trusty straightener. Select an appropriate heat level based on your hair texture and thickness. Thinner or damaged strands may require lower temperatures (around 300°F), while thicker or coarse hair might benefit from slightly higher settings (around 400°F). Remember not to go overboard with excessive heat as it can lead to irreversible harm.
Step 5: Begin Curling
Starting with one section at a time, grasp a small portion of hair (about 1-inch wide) between the plates of your hair straightener. Ensure that the tool is held vertically, with the open end facing upwards. Slowly rotate the straightener away from your face, while simultaneously gliding it down towards the ends of your hair.
Step 6: Holding Technique
To achieve consistent and defined curls, hold the straightener closed for a few seconds (around 5-10 seconds), depending on your desired curl intensity. Remember not to squeeze too tightly or keep it in place for too long, as this may cause undesirable creases or flat spots.
Step 7: Release and Repeat
Gently release the clamp of your straightener and allow the curled strand to fall naturally. Move on to the next section, repeating steps five and six until all sections are curled to perfection. Make sure you alternate between curling toward and away from your face for a more natural-looking result.
Step 8: Final Touches
Once all sections are beautifully curled, let them cool down completely before moving onto styling touches. Avoid running your fingers through curls right away, as this can lead to frizz or loosening of curl pattern. Instead, use a lightweight hairspray or texturizing spray to set and hold those stunning curls in place without weighing them down.
Conclusion:
Creating marvelous curls using only a hair straightener is undoubtedly an art that requires practice, patience, and precision. By following our step-by-step guide diligently, you’ll soon master this technique like a professional hairstylist! Achieving gorgeous curls no longer has to be an arduous task – armed with just your trusty hair straightener and these expert tips; you’ll effortlessly unlock endless styling possibilities whenever you desire bouncy waves or defined ringlets that never fail to impress!
Unlock the Secrets of Curling Hair with a Straightener: Essential Steps Revealed
Unlock the Secrets of Curling Hair with a Straightener: Essential Steps Revealed
Have you ever marveled at those gorgeous, bouncy curls that seem to effortlessly cascade down from someone’s head? You may have wondered how they achieved such voluminous and stunning waves. Well, here’s a secret – you can achieve those envy-inducing curls too, and it doesn’t require an arsenal of curling wands or hot rollers. All you need is a trusty straightener! Yes, that’s right; you can unlock the secrets of curling your hair with this ubiquitous hair tool.
Now we know what you’re thinking – how on earth can a straightener create curls? Allow us to enlighten you. The technique is known as “flat iron curling” or “curling with a straightener,” and it will revolutionize your hairstyling game. This method not only saves you the hassle of purchasing an additional styling tool but also allows for more versatility in achieving different types of curls.
Before diving into the essential steps, let’s debunk the myth that straighteners are solely for taming unruly frizz or achieving sleek, poker-straight locks. With a little bit of practice and finesse, your standard straightener can become your new best friend in creating luscious waves and perfectly defined curls.
So without further ado, let’s reveal the essential steps to unlock the secrets of curling hair with a straightener:
1. Select Your Straightener Wisely:
Not all straighteners are created equal when it comes to curling capability. Look for flat irons that have rounded edges since these allow for smoother gliding through your strands while reducing snagging or tangling. Additionally, ensure your straightener offers adjustable heat settings for optimal temperature control based on your hair type.
2. Heat Protection:
Remember always to protect your mane from excessive heat exposure by applying a high-quality heat protectant spray. This step is crucial to prevent damage and keep your hair healthy, even when using a straightener for curling purposes.
3. Section Your Hair:
Divide your hair into manageable sections. The number of sections depends on the thickness and length of your locks. Smaller sections produce tighter curls, while larger ones create looser waves.
4. Clamp, Twist, and Glide:
Take a section of hair and clamp the straightener near the root. Without releasing the clamp, twist your wrist outwards or inwards to approximately 180 degrees while gliding the straightener gently down towards the ends of your hair. This twisting motion creates beautiful curls as it applies heat evenly throughout each strand.
5. Alternate Directions:
For more natural-looking curls, alternate the direction in which you twist your wrist with each new section. This technique prevents the curls from clumping together and lends a visually appealing texture to your overall hairstyle.
6. Cool Down and Set:
Allow each curl to cool briefly before running your fingers through them gently or giving them a light tousle with a wide-toothed comb. You can also spritz some hairspray onto a bristle brush and lightly brush through the curls to set them in place without sacrificing their natural movement.
7. Finishing Touches:
If desired, apply some anti-frizz serum or lightweight styling cream to tame any flyaways or add extra shine to those fabulous curls!
And voila! You’ve unlocked the secrets of curling hair with a straightener like a true professional stylist! Don’t be discouraged if it takes a few attempts to master this technique; practice makes perfect!
Now that you possess this newfound knowledge, go forth confidently armed with only your trusty straightener and unleash an array of stunning hairstyles that will leave everyone in awe. Who needs expensive salon visits when you can become your very own hairstyling maven? Happy curling!
Curly hair made easy! Learn how to curl your hair using a straightener
Curly Hair Made Easy! Learn How to Curl Your Hair Using a Straightener
Having luscious, bouncy curls is a dream for many. However, the hassle of using a curling iron and potential damage it can cause to your tresses often deter people from achieving those gorgeous waves. But fear not! We’re here to let you in on a little secret that will revolutionize your hairstyling routine – how to curl your hair effortlessly using just a hair straightener!
You might be wondering, how is it possible to achieve stunning curls with a tool designed for straightening? Well, armed with the right technique and some expert tips, you’ll be able to work wonders with your humble straightener.
First things first: preparation! Prioritizing proper hair care before delving into styling is essential. So start by washing and conditioning your locks using products suitable for curly hair. This ensures that your curls stay hydrated and resilient throughout the process.
Once your hair is refreshed, gently towel dry it and apply a heat protectant spray evenly from root to tip. Heat protectants are essential as they shield your strands from potential damage caused by excessive heat exposure. Remember, healthy hair always comes first!
Now, divide your hair into manageable sections or layers. Smaller sections create tighter curls while larger ones result in looser waves – choose according to preference. It’s best to start at the back of your head and work towards the front; this allows easier access and better control over the styling process.
Take one section of hair (about an inch wide) and securely clamp the straightener at its root. Slowly glide down towards the end while twisting it away from your face as you move along. The twisting movement is key as it creates those beautiful spirals that give off an effortless chic vibe.
But wait! Don’t be too hasty with releasing the curl just yet – hold onto it after reaching the end, allowing the hair to set for a few seconds before gently pulling the straightener downwards. This ensures your curls stay intact and bouncy.
Continue this technique throughout your entire head, paying attention to alternating the direction of each twist. This creates a more natural-looking curl pattern that adds dimension to your hairstyle. Don’t forget to take breaks in between sections if needed – we want this process to be as easy and enjoyable as possible!
Once all sections are curled, use your fingertips (or a wide-toothed comb) and gently loosen the curls for a more effortless look. If you prefer tighter ringlets, leave them undisturbed. For those aiming for voluminous curls, flip your head upside down and shake out those luscious locks – voila! Hello, red carpet-worthy curls!
To ensure longevity of your stunning new ‘do, spritz on some lightweight hairspray or apply a small amount of curl-enhancing cream through the ends of your hair. This helps seal in the shape while keeping frizz at bay.
And there you have it – curly hair made easy using only a hair straightener! By following these steps and incorporating a little practice into your routine, you’ll become an expert at achieving glamorous curls without any fuss or heat damage concerns.
So why wait? Embrace those naturally occurring waves or create cascading curls with ease. With this newfound knowledge in hand, let your creativity shine through by experimenting with different hairstyles suited for any occasion. Curly-haired dreams can finally come true without compromise!


