- Short answer on how to curl hair:
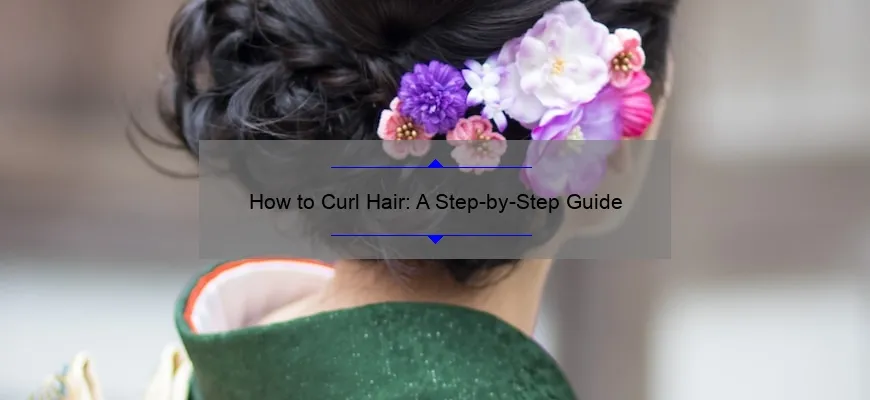
- How to Curl Hair: A Step-by-Step Guide for Beginners
- Common FAQs answered: How to Curl Hair the Right Way
- Mastering the Art of Curling Hair: Top Tips and Techniques
- Essential Tools for Gorgeous Curls: What You Need to Know
- Beyond the Basics: Advanced Techniques for Long-lasting Curls
- Troubleshooting Guide: Fixing Common Curling Mishaps
Short answer on how to curl hair:
Curling hair can be achieved using various methods such as using a curling iron, hot rollers, flexi rods, or braiding damp hair. Start with clean dry or slightly damp hair, section it off and wrap small strands around the chosen tool. Hold for a few seconds before releasing for defined curls.
How to Curl Hair: A Step-by-Step Guide for Beginners
Welcome to our step-by-step guide on how to curl your hair, perfect for beginners! In this blog post, we will walk you through the entire process of achieving beautiful curls that will make heads turn. So grab your curling iron and let’s get started!
Step 1: Prepare Your Hair
Before diving into the curling process, it’s essential to prepare your hair properly. Start by shampooing and conditioning your locks with products that add moisture and promote smoothness. Once out of the shower, gently towel-dry your hair to remove excess water.
Step 2: Apply Heat Protectant
Protecting your precious strands from heat damage is key when curling your hair. So don’t forget to apply a heat protectant spray or serum evenly throughout your hair. This step not only shields your tresses but also ensures that the curls last longer.
Step 3: Choose Your Curling Tool Wisely
Now comes the fun part – selecting the perfect curling iron for the look you desire. If you want traditional curls with bounce, go for a classic clamp-style curling iron. For natural-looking beach waves, opt for a wand or a flat iron technique. Remember, different tools create different types of curls, so choose wisely!
Step 4: Divide and Conquer
To avoid chaos during the styling process, divide your hair into manageable sections using clips or rubber bands. This allows you to focus on one section at a time and guarantees more even and defined curls.
Step 5: Let’s Get Curling!
Take a small section of hair (about an inch wide) from one of the divided sections. Start wrapping it around the barrel of your chosen tool, making sure to leave out about an inch from the ends for that effortless finish.
Step 6: Time It Right
The duration you leave each section wrapped around the barrel depends on many factors such as hair type and desired result. As a general rule, count to 10 or 15 seconds before carefully releasing the curl. Avoid holding for too long unless you want to rock Shirley Temple-like ringlets.
Step 7: Keep It Cool
Once you’ve released the curl from the iron, it’s important to let it cool completely before touching or manipulating it. This allows the curl to set and provides better longevity throughout the day.
Step 8: Repeat, Repeat, Repeat!
Continue curling section by section until your entire head is transformed into a sea of beautiful curls. Remember that practice makes perfect, so don’t be discouraged if your first attempts don’t turn out as planned!
Step 9: Shake It Out
After all sections have been curled and cooled down, gently run your fingers through your hair (or use a wide-toothed comb) to loosen up the curls and create a more relaxed look. You can add some hairspray for extra hold or even apply some texturizing spray for added volume and dimension.
Voila! You’ve successfully curled your hair like a pro! Whether you’re going for an everyday casual look or getting dolled up for a special occasion, these steps will help you achieve stunning curls that will make heads turn in admiration.
Remember, practice and experimentation are key when it comes to hair styling. Don’t be afraid to try different techniques or mix things up with various curl sizes – that’s where the fun lies! So go ahead and embrace your inner hairstylist; we can’t wait to see the fantastic results you’ll achieve using this step-by-step guide on how to curl your hair like a pro. Happy styling!
Common FAQs answered: How to Curl Hair the Right Way
Title: Common FAQs Answered: Mastering the Art of Curling Hair
Introduction:
Are you tired of spending countless hours trying to achieve those perfect, luscious curls that seem to elude your grasp? Fret not, for we have compiled a comprehensive guide answering some of the most common FAQs about curling hair. Get ready to unleash your inner hairstylist as we delve into the secrets of achieving stunning curls, with finesse and expertise.
1. What tools do I need?
To achieve flawless curls, arm yourself with three essential tools: a quality curling iron or wand, heat protection spray, and hair clips. Opt for a curling iron with multiple heat settings; this way, you can customize the temperature based on your hair type and desired style. Remember to liberally spritz heat protection spray throughout your locks before applying any heat.
2. How should I prepare my hair?
Prepping your hair before curling is crucial for long-lasting results. Start by washing and conditioning your locks using moisturizing products tailored to your hair type. Once towel-dried, apply a lightweight mousse or volumizing spray at the roots for added body and hold. Before diving into styling, ensure that your hair is completely dry; otherwise, you risk damaging it.
3. What technique should I use?
With an array of curling techniques out there – ranging from traditional curls to beach waves – it’s vital to select the one that suits your desired look. For structured ringlets, divide your hair into small sections and wrap each around the barrel of the curling iron away from the face. On the other hand, for loose waves or beachy curls, opt for larger sections and alternate between wrapping some strands towards and others away from your face.
4. How long should I hold each section?
The duration you keep each section wrapped around the barrel largely depends on two factors: hair thickness and desired tightness of the curls. In general, thin hair requires shorter holding time (around 5-8 seconds) to avoid overexposure to heat, while thicker hair may require a few extra seconds for optimal results. Experimentation will help you determine what works best for your unique hair type.
5. How do I make my curls last longer?
Maintaining curl longevity is an art in itself. Once you release each section from the curling iron, let it cool completely before touching or styling further. For additional staying power, gently loosen and separate the individual curls with your fingers to create a more natural and voluminous look. Finish off with a light mist of hairspray formulated for hold without stiffness.
6. What if my curls don’t turn out as expected?
Even experienced hairstylists encounter mishaps occasionally, so don’t be discouraged if your initial attempt isn’t perfect. If your curls fall flat within minutes, the most common culprit is excess oil or product buildup weighing down the strands. Ensure that your hair is clean and devoid of excessive products before curling to allow the heat to take full effect.
Conclusion:
Mastering the art of curling hair may seem daunting at first glance, but armed with this knowledge, you’ll soon be achieving awe-inspiring hairstyles worthy of professional hairstylists themselves. Remember to choose appropriate tools, prepare your hair diligently, employ suitable techniques, and show patience during styling – all these factors are key ingredients in achieving those picture-perfect curls that can turn heads wherever you go!
Mastering the Art of Curling Hair: Top Tips and Techniques
Welcome to our ultimate guide on mastering the art of curling hair! Whether you’re looking to add some bounce and volume or create stunning, Hollywood-worthy curls, we’ve got you covered with our top tips and techniques.
1. Know Your Tools:
Before diving into the world of curling hair, it’s essential to familiarize yourself with the various tools available. The two most popular options are curling irons and curling wands. Curling irons have a clamp that holds the hair in place, while wands offer a clamp-less design for more natural-looking curls. Choose what best suits your style and comfort.
2. Prep Your Hair:
Proper preparation is key to achieving long-lasting curls. Begin by washing your hair, ideally one day prior to styling as clean hair can be harder to curl. Apply a lightweight heat protectant spray or cream from roots to ends to shield your tresses from damage caused by excessive heat styling.
3. Section It Out:
Separating your hair into sections ensures that every strand gets properly curled. Start by dividing your hair into top and bottom halves using a horizontal part at ear level. Then further divide these sections into smaller subsections depending on how thick or thin your hair is.
4. Find Your Technique:
There are several techniques you can explore when curling your hair:
– Classic Curls: Take small sections of about 1-inch wide (or wider if you prefer looser waves) and wrap them around the iron or wand away from your face for a classic look.
– Beachy Waves: For effortlessly tousled waves, take larger sections of 2-3 inches and wrap them around the barrel in alternating directions.
– Spiral Curls: Achieve bouncy ringlets by tightly wrapping small portions of hair around the iron or wand vertically instead of horizontally.
5. Perfect Your Timing:
The duration that each section spends wrapped around the tool will determine how tight or loose your curls are. Generally, leave the hair wrapped for 8-12 seconds to achieve beautiful waves. Experiment with different timings to find what works best for you.
6. Cool Down and Set:
After releasing each curl from the tool, let it cool down for a few seconds before touching them. This allows the curl to set and retain its shape for longer.
7. Comb and Style:
Once all curls have cooled, use a wide-toothed comb or your fingers to gently brush through your locks, creating soft and natural-looking waves. You can also use a texture spray or hairspray to add definition or hold the style in place throughout the day.
8. Maintain Your Curls:
To ensure your hard work doesn’t go to waste, there are a few steps you can take to maintain your curls throughout the day. Avoid touching or running your fingers through your hair too much as this can cause frizzing and flatten your curls faster. Additionally, consider sleeping on a silk pillowcase to reduce friction that could ruin your curls overnight.
Now that you’re armed with these expert techniques, go ahead and unleash your inner hairstylist! With some practice and creativity, you’ll soon be curling like a pro, turning heads wherever you go. So grab those tools and get ready to create stunning styles worthy of any red carpet event!
Essential Tools for Gorgeous Curls: What You Need to Know
Are you dreaming of fabulous, bouncy curls that will turn heads wherever you go? Achieving those gorgeous curls may seem like a daunting task, but with the right tools at your disposal, you can make it a breeze. In this blog post, we’ll walk you through the essential tools you need to know in order to achieve those stunning curls you’ve always desired.
1. Curling Iron: The Holy Grail of Curling Tools
Let’s start with the classic curling iron, the hero in creating those beautiful waves. With its heated barrel and various sizes available, it allows you to control the size and shape of your curls effortlessly. Whether you desire tight ringlets or loose beachy waves, investing in a high-quality curling iron is an absolute must.
2. Curling Wand: Unleash Your Inner Stylist
For those looking for versatility and endless styling options, a curling wand is an excellent addition to your hair tool collection. Unlike traditional irons, wands don’t have a clamp, which means they provide more flexibility when it comes to achieving different curl patterns. Additionally, they allow for seamless transition from tight coils to relaxed waves without any marks from the clamp—perfect for creating natural-looking curls!
3. Hot Rollers: Time-Saving Elegance
If convenience and time-saving are your priorities when styling your hair, then hot rollers are here to save the day! These little cylinders might seem old-school, but they’re making a major comeback in today’s hairstyling world. Once heated up and rolled into your locks, these rollers will effortlessly transform your hair into voluminous cascades of curls that last all day long.
4. Flexi Rods: The No-Heat Magic
For those seeking heat-free alternatives that won’t damage their precious locks while maintaining incredible results—a pack of flexi rods is their secret weapon! These bendable sticks made from foam or plastic can be comfortably wound into your hair, creating beautiful curls overnight. Just apply a little setting spray before winding your hair around the rods and let them work their magic as you sleep.
5. Diffuser: Divine Volume for Curly Girls
Curly-haired gals understand the struggle of maintaining volume without frizz. Enter the diffuser, an attachment designed specifically for blow-drying curly hair. A diffuser disperses air evenly across a larger surface area, encouraging defined and voluminous curls while minimizing frizz. It’s a game-changer for those blessed with natural curls!
6. Curl Enhancing Products: The Wizard’s Potions
Now that you’re equipped with an array of fabulous tools, don’t forget to invest in high-quality curl-enhancing products that will take your curls to new heights. From curl serums to mousse and styling creams—these magical potions will provide moisture and hold to help you achieve flawless, long-lasting curls.
Now that you have unraveled the secrets behind achieving gorgeous curls, it’s time to invest in these essential tools. Whether you opt for traditional heat-styling methods or experiment with heat-free alternatives, remember that practice makes perfect! With a touch of creativity and these essential tools at hand, get ready to unlock a world of stunning hairstyles that will make heads turn wherever you go!
Beyond the Basics: Advanced Techniques for Long-lasting Curls
You’ve mastered the art of curling your hair, and you’re feeling confident in your ability to create those perfect bouncy curls. But what if there was a way to take it to the next level? In this blog post, we will delve into advanced techniques for achieving long-lasting curls that will have people thinking you just stepped out of a salon.
1. Prepping is key: Before even picking up your curling iron, make sure your hair is properly prepped. Start by washing with a volumizing shampoo and conditioner to give your locks some extra lift. Next, apply a heat protectant spray to shield your strands from damage caused by hot tools.
2. Section it off: To ensure even curls, divide your hair into small sections using clips or hair ties. This not only makes the process more manageable but also allows for better control when curling.
3. Pick the right temperature: Most curling irons offer various heat settings, so choose one that suits your hair type. Fine or damaged hair generally requires lower temperatures, while thick or coarse hair can handle higher heat without getting fried.
4. Wrap it up: Instead of clamping the curling iron down on each section of hair, try using the wrapping technique for a more natural-looking curl. Simply wrap a small section around the barrel of the iron, holding onto the ends and allowing them to stay uncurled for added dimension.
5. Time matters: Don’t rush! Give each section enough time to heat through and set before releasing it from the iron. This ensures that the desired shape stays intact for longer-lasting curls.
6. Cool it down: Once you release each curled section from the iron, don’t immediately touch or tousle them. Let them cool completely before running your fingers through them or separating them with a wide-toothed comb. This helps lock in the shape and prevents premature loosening.
7. Lock them in place: To ensure your curls hold up against the test of time, use a medium to strong-hold hairspray. Hold the can about 12 inches away from your head and mist lightly all over. Avoid over-spraying, as this can leave your hair feeling stiff.
8. Embrace texture: For added longevity, embrace some strategic messiness! Run your fingers gently through the curls or give them a slight shake to break them up slightly. This will create a more lived-in look that actually holds better throughout the day.
9. Sleep on it: If you want those curls to last overnight, consider opting for a satin pillowcase or wrapping your hair in a silk scarf before bed. The smooth surface reduces friction and helps maintain the shape without causing excessive frizz or flattening.
10. Revive and refresh: As time goes on, curls may naturally loosen up. Instead of reaching for the heat tools again, try reviving them with a curl-revitalizing spray or texturizing powder. These products add instant grip and volume to sagging curls without weighing them down or making them sticky.
By following these advanced techniques, you’ll be able to achieve gorgeously long-lasting curls that turn heads wherever you go. So go ahead and take your curl game to new heights – you deserve hair that’s worth flaunting!
Troubleshooting Guide: Fixing Common Curling Mishaps
Introduction:
Curling is not just a sport; it’s an art, a delicate balance between technique and finesse. However, even the most experienced curlers can run into some common mishaps that can throw their game off track. Fear not! In this troubleshooting guide, we will dive into those pesky problems and provide you with witty and clever solutions to fix them.
1. Slipping on the Ice:
Picture this: you’re gliding down the ice gracefully when suddenly, without warning, your feet lose their grip. It’s a slip-n-slide disaster waiting to happen. Don’t panic! To prevent this embarrassing mishap, make sure your shoes are clean and free from any debris or moisture before stepping onto the ice. If slipping persists, consider investing in shoes with better traction or use grippers for extra stability.
2. Delivery Woes:
You’ve practiced your delivery a hundred times, but now you find yourself overthrowing or underthrowing the stone consistently. What gives? Remember the tale of Goldilocks – the delivery should be just right! Pay attention to your body positioning and aim for a balanced stance. Ensure that your slide is fluid and controlled while maintaining proper weight transfer from back to front foot during release. Practice makes perfect!
3. Sweeping Mishmash:
Sweeping is an integral part of curling – it can alter the path of a stone dramatically! But what if you feel like you’re exerting immense effort without achieving desired results? Firstly, check your broom head for wear and tear; worn-out bristles won’t have optimal effectiveness. Secondly, focus on applying consistent pressure while sweeping – too light or too heavy may affect the desired outcome.
4. Weighty Worries:
Sometimes it feels like every stone you deliver ends up being way too heavy or light compared to what you aimed for! This problem may lie in judging how much energy to put behind your throw. Take some time to understand the ice conditions, as they can vary from day-to-day or even end-to-end. Communicate with your sweepers to gauge the weight accurately and make necessary adjustments.
5. Line Lamentations:
Oh no! Your stone was perfectly delivered in terms of weight, but its line ended up way off course. What went wrong? Analyze how you released the stone – a slight twist or tilt during release can cause directional deviations. Remember to keep your arm straight and aligned with your target throughout the delivery, allowing for a clean and accurate release.
Conclusion:
Even for seasoned curlers, encountering common mishaps is all part of the game. The key is not to get discouraged but rather embrace these challenges as opportunities for growth and improvement. By following our troubleshooting guide and implementing our witty solutions, you’ll be better equipped to overcome common curling mishaps like a pro! So step back on that ice rink with confidence, knowing that you’ve got what it takes to conquer any problem that comes your way. Good luck!


