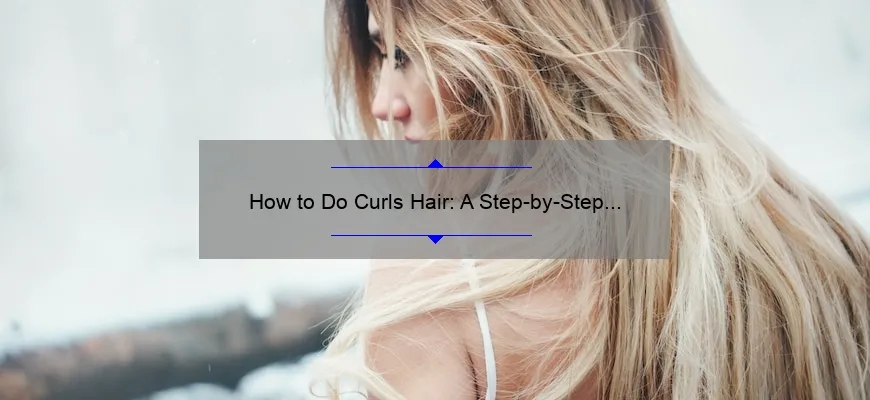
- Short answer: How to do curls hair:
- Beginner’s Guide: How to Do Curls Hair Step by Step
- Mastering the Art of Curling Hair: Tips and Tricks
- Frequently Asked Questions about How to Do Curls Hair
- Exploring Different Curling Techniques for Gorgeous Hair
- Achieving Long-Lasting Curls: Products You Need to Know About
- Pro Secrets for Heat-Free Curls: No Damage, All Style
Short answer: How to do curls hair:
To curl your hair, first, make sure it is clean and dry. Divide it into sections and use a curling iron or curling wand to wrap each section around the barrel. Hold for a few seconds, then release. Repeat until all sections are curled. Finish with hairspray for longer-lasting curls.
Beginner’s Guide: How to Do Curls Hair Step by Step
Title: Beginner’s Guide: Transforming Your Hair with Glamorous Curls
Introduction:
Are you tired of your everyday hairstyle and longing for a glamorous makeover? Look no further! Curling your hair can instantly add volume, bounce, and create a stunning look that will turn heads wherever you go. While it may seem daunting at first, with our step-by-step guide, even beginners can achieve salon-quality curls in no time. So grab your curling iron and let’s dive into the wonderful world of curling!
Step 1: Prepping like a Pro
Before diving into the actual curling process, it is crucial to prep your hair properly. Start by washing and conditioning your locks using products specifically designed for heat protection. Applying a small amount of volumizing mousse to the roots will give an extra lift that lasts longer. Remember, healthy and nourished hair is key to achieving impeccable curls.
Step 2: Tools of the Trade
Investing in quality tools is essential when it comes to creating fabulous curls. For beginners, we recommend starting with a medium-sized curling iron (approximately 1 inch in diameter) as it provides versatility for different styles. Ensure that your curling iron has adjustable temperature settings suitable for your hair type.
Step 3: Protect and Style
After blow-drying your hair completely, apply a heat protectant spray or serum evenly throughout the strands to shield them from potential damage caused by high temperatures. Comb through gently to distribute the product evenly.
Step 4: Section Your Way to Success
The key to effortlessly stylish curls lies in sectioning off your hair before styling. Divide your mane into manageable sections using clips or hair ties – typically three or four sections work well depending on the thickness of your hair. This technique ensures each section gets equal attention during the curling process.
Step 5: The Curling Ritual Begins
Now comes the exciting part! Start by selecting a small section of hair – around one to one-and-a-half inches wide – and hold it at the ends. Wrap the hair around the curling iron barrel away from your face, making sure to leave a few inches at the end uncurled for a more natural look. Hold the curling iron in place for about 8-10 seconds (adjusting according to your hair type) before releasing the curl gently.
Step 6: Repeat and Mix It Up
Continue with this technique, taking small sections and curling them away from your face until you’ve completed all sections. Remember, curls should not be uniform; mixing up the direction of curls adds dimension and creates that effortlessly tousled look. Alternate between wrapping some sections over the iron and others under it to achieve varied results.
Step 7: Final Touches
Once all your sections are curled to perfection, resist the urge to run your fingers through them just yet. Allow your hair to cool down completely before lightly running a wide-toothed comb or your fingers through it for added volume and separation. Finish off by spritzing on some flexible hold hairspray to lock in those gorgeous curls throughout the day.
Conclusion:
Now that you’re armed with our beginner’s guide, you can confidently embark on your journey towards achieving stunning curls that would make even professional hairstylists envious! Remember, practice makes perfect, so don’t be discouraged if your first attempt isn’t red carpet-worthy. With time and patience, you’ll master this art form effortlessly. So go ahead – enjoy experimenting with different styles, rock those glorious curls like never before, and step out into the world feeling fabulous!
Mastering the Art of Curling Hair: Tips and Tricks
Title: Mastering the Art of Curling Hair: Unveiling Expert Tips and Clever Tricks
Introduction:
Curling hair is an art form that allows you to transform your locks from bland to breathtaking. It’s a versatile technique that can give you luscious waves, bouncy curls, or glamorous ringlets. However, mastering this art requires knowledge, practice, and a dash of creativity. In this blog post, we will delve into the world of curling hair and share essential tips and clever tricks to help you become a hairstyling maestro.
Understanding Your Tools:
Before diving into the realm of curling, understanding your tools is crucial. Different curlers offer distinct results. For loose waves or natural-looking curls, opt for a larger barrel size. Smaller barrels create tighter curls or coveted spiral locks. Additionally, consider whether a curling iron or wand suits your needs best – each offers its own unique benefits depending on your desired look.
Prepping your Tresses:
Achieving flawless curls begins with proper preparation. Ensure your hair is clean and dry before starting the styling process—this helps prevent sizzling strands or uneven outcomes caused by residual moisture. Before applying heat to your hair, spritz on some heat protectant spray; this step not only shields your precious locks but also enhances longevity.
Divide and Conquer:
Dividing your hair into manageable sections guarantees easier handling during the curling session and promotes consistent results throughout. Skilfully separate your tresses horizontally from ear to ear (or alternatively clip away upper portions), allowing you to focus solely on one section at a time – and ensuring no strand ever feels left out!
The Magic of Alternating Directions:
To achieve stunningly natural-looking curls akin to those enviable beachy waves or effortless tousles you see in magazines, employ the secret weapon: alternating directions while curling! Start by clasping sections around the wand or iron, curling them away from your face. In the subsequent section, curl towards your face. This creative interplay between inward and outward curls adds dimension and movement to your hair, rendering it visually captivating.
Mastering Time and Temperature:
To avoid catastrophic curling mishaps or damaging your precious locks, understanding the relationship between time and temperature is vital. Adjust heat levels according to your hair type; finer textures necessitate lower heat settings while thicker hair can withstand a higher temperature. Remember, hold each section around the barrel for a few seconds (around 10-15) – this duration provides ample time for the heat to work its magic without overheating or frying your strands.
Setting Your Curls with Finesse:
Nothing is more disheartening than spending hours on perfecting those enviable curls only to witness them deflate within minutes. Fear not! Lock in those stunning curls by setting them gently with a blast of cool air from your blow dryer. Alternatively, remove each curled section from the iron and immediately coil it up while still warm; secure it against your scalp using a bobby pin until it cools down completely. The combination of cool air or strategic pinning ensures longer-lasting curls that will keep heads turning all night long.
The Finishing Flourish:
To complete this virtuoso performance in curling hair, embrace products designed specifically for preserving and enhancing those gorgeous tendrils. A lightweight hairspray can be spritzed on lightly to hold everything in place without weighing down the hair’s natural bounce and movement. Additionally, adding texturizing spray or volumizing powder at the roots amplifies volume while maintaining flexibility throughout the day.
Closing Thoughts:
With these expert tips and clever tricks up your sleeve, you’re ready to embark upon an exhilarating journey mastering the art of curling hair. Don’t be afraid to experiment, unleash creativity, and trust that practice makes perfect—the more you delve into this art form, the more confident you’ll become. So, prepare your tools, divide and conquer, play with different curling styles, perfect your technique, and watch as heads turn in awe of your stunning curls!
Frequently Asked Questions about How to Do Curls Hair
Frequently Asked Questions about How to Do Curls Hair
Curls can instantly transform your hairstyle from blah to beautiful, adding texture, volume, and a touch of elegance. However, mastering the art of curling hair may seem a bit daunting at first. With so many tools and techniques available, it’s no wonder people have numerous questions when it comes to achieving gorgeous curls. In this blog post, we’ll address some frequently asked questions about how to do curls hair and provide you with detailed answers that combine professionalism with a dash of wit and cleverness.
1. Which curling tool should I use?
Ah, the age-old question! When it comes to choosing the right curling tool for your hair, there are several options: curling iron, curling wand, or hot rollers. To decide which one suits you best, consider your desired curl size and look. If you’re after well-defined ringlets or tight curls that could put Shirley Temple to shame, a smaller barrel curling iron is your best bet. On the other hand, if effortless beach waves or loose curls are what you’re seeking – hello Victoria’s Secret angel vibes – opt for a larger barrel curling wand or hot rollers.
2. What heat setting should I use?
Finding the perfect heat setting can be tricky since each individual’s hair reacts differently to heat styling. As a general rule of thumb, start with lower temperatures and gradually increase until you find the sweet spot where your locks hold their curls without becoming fried potato crisps. Fine or damaged hair usually requires less heat (around 300°F), while thick or coarse tresses can handle slightly higher temperatures (up to 400°F) without sacrificing their health.
3. How do I make my curls last longer?
We’ve all been there – spending hours creating oh-so-perfect curls just for them to vanish into thin air within minutes! Fear not; we’ve got tips to extend the lifespan of your curls. Firstly, be sure to prep your hair with a heat protectant spray and use a lower heat setting to prevent unnecessary damage. After curling each section, let the curl cool in your hand before releasing it; this helps set the shape. Finally, finish off with a spritz of hairspray or apply a lightweight texturizing powder to give your curls some grip and hold throughout the day.
4. Should I curl my hair before or after styling?
Ah, the eternal conundrum! Generally, it’s best to curl your hair before styling – that is unless you’re aiming for mermaid-inspired waves flowing seamlessly into straighter ends. By curling first, you have more control over creating uniform curls throughout your mane. Plus, if any sections need touch-ups after styling (hello stubborn fringe!), you can easily address them without disrupting your carefully arranged locks.
5. Can I achieve natural-looking curls without heat?
Certainly! If you want curly tresses without exposing your hair to heat damage, there are alternative methods like rag rolling or braiding damp hair before bed for overnight waves. Experiment with no-heat techniques such as twist-outs or flexi-rods for bouncy curls that’ll make heads turn while keeping your strands happy and healthy!
There you have it – answers to some frequently asked questions on how to do curls hair in all their detailed professional yet witty and clever glory! Embrace the world of curls with confidence armed with these tips and techniques, ensuring every day is a good hair day full of marvelous twists and turns. Happy curling!
Exploring Different Curling Techniques for Gorgeous Hair
Title: Mastering the Art of Curling: Unlocking Exquisite Hairstyles
Introduction:
Achieving luscious curls that accentuate our facial features is an art form in itself. We all yearn for that picture-perfect, head-turning mane that effortlessly exudes elegance and confidence. In this blog post, we delve into the realm of curling techniques, unlocking a treasure trove of knowledge to help you transform your hair into a stunning masterpiece. Join us as we explore a variety of curling techniques that will leave you with nothing short of gorgeous hair.
1. Classic Curls:
Our journey begins with the timeless technique of classic curls – perfect for those seeking a soft and romantic look. To achieve these bouncy curls, start by dividing your hair into sections and then wrap each section around the barrel of your curling iron away from your face. Hold for a few seconds before gently releasing to reveal perfectly formed classic curls that will surely make heads turn.
2. Beachy Waves:
For those aiming to create an effortlessly chic style reminiscent of salty beach days, beachy waves are the way to go! Begin by spritzing a texturizing spray onto damp hair, then scrunch your strands as you blow dry them using a diffuser attachment. Once dry, take random sections of hair and use a wide-barrel curling wand to create loose waves in alternating directions. Finish off by tousling and applying some sea salt spray for that au naturel beachy vibe.
3. Spiral Curls:
If you desire glamorous Hollywood-inspired locks akin to red carpet stunners, spiral curls are an absolute must-try technique! Begin by selecting small sections of hair and wrapping them tightly around the barrel of your curling iron from root to tip, ensuring even heat distribution throughout each strand held in place for several seconds before releasing. Allow these divine spirals to cascade down gracefully while dropping jaws wherever you go.
4. Pin Curls:
Resurrecting the charming vintage allure of pin curls is perfect for those looking to add a touch of retro elegance to their hairstyle repertoire. Start with damp hair, then twist small sections away from your face, securing them in place with bobby pins close to the scalp. Allow your hair to air dry completely or use a diffuser if you’re in a rush. Once dry, gently remove the pins and run your fingers through your hair delicately for enchanting, vintage-inspired curls that are bound to captivate.
5. Finger Coiling:
For our curly-haired beauties seeking extra definition and bounce, finger coiling is nothing short of magical! Begin by sectioning damp hair into smaller strands and apply a curl-defining cream or gel generously. Take each section between your fingertips and twirl it around itself tightly from root to tip until you reach the end. Repeat this process throughout your entire head before allowing your delicate finger coils to air dry or using a diffuser attachment for added speed.
Conclusion:
With these diverse curling techniques up your sleeve, you have the power to transform yourself into an enchantress capable of breathtaking hairstyle transformations. Whether you opt for classic curls, beachy waves, spiral locks, pin curls, or finger coiling depends on the mood you wish to evoke and the occasion at hand – but rest assured that gorgeous hair will be yours no matter which path you choose! Embrace experimentation and let your creativity soar as you craft personalized looks that showcase both elegance and individuality – revolutionizing how people perceive gorgeous hairstyles one curl at a time.
Achieving Long-Lasting Curls: Products You Need to Know About
Achieving Long-Lasting Curls: Products You Need to Know About
Curls are not just a passing trend – they are a timeless and glamorous hairstyle that adds bounce and texture to any look. But let’s be honest, getting those curls to stay intact all day can be quite the challenge. Luckily, there are some incredible products out there that can help you achieve long-lasting curls without the frustration of having them fall flat halfway through the day. Get ready to say goodbye to limp and lifeless curls and hello to voluminous and bouncy locks!
1. Heat Protectant: The first step in achieving long-lasting curls is protecting your hair from heat damage. Using a heat protectant spray or serum before applying any hot styling tools is essential. Not only does it shield your strands from the damaging effects of heat, but it also helps lock in moisture, keeping your curls healthy and frizz-free.
2. Curl Enhancing Mousse: Want to take your natural curls to the next level? Look no further than curl enhancing mousse! This lightweight foam adds definition, volume, and hold to your curls without weighing them down. Apply a small amount evenly throughout your damp hair before styling for maximum bounce and longevity.
3. Diffuser Attachment: Say goodbye to the dreaded flat roots by investing in a diffuser attachment for your hairdryer. This nifty tool helps distribute airflow evenly, minimizing frizz while enhancing your natural curl pattern. Gently scrunching your hair with the diffuser while drying will result in bouncy, defined curls that last all day.
4. Hairspray: A good quality hairspray can work wonders when it comes to holding those beautiful curls in place. Opt for a flexible-hold hairspray that provides long-lasting control without making your locks feel stiff or crunchy. Remember, less is more – apply just enough hairspray to keep everything in place without weighing down your bouncy curls.
5. Curling Iron or Wand: If you weren’t born with natural curls, fear not! A high-quality curling iron or wand can be your best friend when it comes to achieving those long-lasting curls. Look for a tool that has adjustable heat settings, as different hair types may require different temperatures for optimal results. Remember to wrap small sections of hair around the barrel and hold for a few seconds before releasing, ensuring even heat distribution for consistent and defined curls.
6. Leave-in Conditioner: A hydrating leave-in conditioner can do wonders for keeping your curls looking fresh and bouncy throughout the day. Look for a lightweight formula specifically designed for curly hair that provides moisture without weighing down your locks. Applying a small amount to damp hair before styling will help reduce frizz and keep your curls looking vibrant all day long.
7. Silk Pillowcase: Believe it or not, your pillowcase can also play a role in maintaining those luscious curls overnight. Switching to a silk pillowcase reduces friction against your hair, preventing tangles and potential damage while you sleep. This means you’ll wake up with perfectly intact curls that are ready to take on the day!
Achieving long-lasting curls doesn’t have to be an uphill battle. By incorporating these tried-and-tested products into your hairstyling routine, you can enjoy bouncy, defined curls that last from morning till night – no more mid-day touch-ups required! So go ahead, embrace your inner curl goddess and rock those stunning locks with confidence. Your fabulous curly hairstyle awaits!
Pro Secrets for Heat-Free Curls: No Damage, All Style
Pro Secrets for Heat-Free Curls: No Damage, All Style
Are you tired of using heat styling tools that leave your hair brittle and damaged? Look no further! We’ve got the ultimate pro secrets to achieve stunning curls without any heat. Get ready to rock those gorgeous, bouncy locks while keeping your mane healthy and fabulous.
1. The Overnight Game-Changer: Twists and Braids
One of the easiest ways to create heat-free curls is by relying on the smart technique of twists and braids. Before heading to bed, divide your slightly damp hair into sections and start twisting each section tightly from root to tip. Secure them with small elastics or bobby pins if necessary. Alternatively, you can opt for braids – French or Dutch – depending on your preference. The trick here is to keep the twists or braids intact overnight so they have ample time to set. In the morning, unravel them gently, running your fingers through for voluminous waves that scream “effortlessly chic.”
2. Rollers for Retro Glamour
If you crave glamorous vintage-inspired curls without resorting to heat tools, rollers are here to save the day! Choose Velcro or foam roller sets in various sizes according to your desired curl pattern – smaller ones will create tighter curls while larger ones give a looser effect. Apply some mousse or setting lotion onto damp hair before rolling each section onto a roller smoothly from end-to-root and secure it in place. Leave them overnight or until completely dry, allowing gravity-defying volume and nonchalant waves to take center stage when you unravel the rollers.
3. Beachy Waves with Salt Spray Magic
For those effortlessly tousled beachy waves beloved by fashionistas everywhere, salt spray is an absolute must-have in your hair care arsenal. Create a DIY version by filling a spray bottle with warm water (approximately 8 ounces) and adding a tablespoon of sea salt along with a teaspoon of leave-in conditioner or a few drops of your favorite essential oil for fragrance. Spritz the concoction generously onto slightly damp hair, scrunching the strands with your hands to enhance texture. Let hair air-dry or use a diffuser if you need to speed up the process. You’ll be left with magnificent mermaid-worthy waves that are both sexy and carefree.
4. The Sock Curler Tactic
Believe it or not, socks aren’t just for keeping your feet warm – they can transform into fantastic heat-free curlers! Start by cutting the toes off a clean sock and roll it like a donut from top to bottom, creating a DIY hair donut. Dampen your hair slightly and divide it into sections, then take each section and wrap it around the sock donut from root to tip until you reach your scalp. Secure them in place using bobby pins or small elastics if needed. Leave overnight and untangle those dreamy curls in the morning.
5. Embrace Textured Braids
Sometimes you might want more than just curls – textured braids offer versatility beyond belief! Begin by dividing your dry or slightly damp hair into multiple sections and create loose braids using any braiding technique you prefer (French, fishtail, or even simple three-strand). Make sure not to braid too tightly; leaving some slack ensures effortless texture later on. Leave these braids on for a few hours while going about your day at home or work. Once ready, undo them gently with your fingers and voila! Perfectly imperfect waves that exude confidence and style.
So there you have it – five pro secrets for achieving heat-free curls: no damage but all style! From overnight techniques to clever hacks using everyday items, now you can ditch those damaging hot tools without sacrificing stunning curls. Remember, healthy hair is always trendy, so embrace these heatless methods and let your strands shine like never before!


